Update Jan 2, 2018: I believe that this article has covered most components you need. If you have any problem, you’re welcomed to contact me (tho I am not a professional guy) at… you can find my contact :)
Docker is now a hot topic, which is an open platform for developers and sysadmins to build, ship, and run distributed applications. It is good if you want to isolate different app environments.
Another topic today, Mailman, is a free software for managiing mailing list. It is a GNU project and it offers a good interface. In this article, I would like to introduce how to use Docker to deploy Mailman 3 on AWS, with Postfix and Amazon SES.
In this tutorial, I will assume that you are using macOS or Linux, which has an embedded OpenSSH tool. If you are using Windows 10, you may use the Windows Subsystem for Linux. For more information on the subsystem, please refer to MSDN - Windows 10 Installation Guide .
Initialize a new EC2 Instance
Before we go into the EC2 part, there remains a question — why not Elastic Container Service? One simple answer is, we need to deploy images on one instance (to save resource). So, let’s get started.
Generate a SSH Key
First you need a SSH keys. By default, Amazon EC2 instances only allow user to log in using Key-Based Authentication. SSH keys provide an easy and secure way of logging into your server with only a pair of public/private keys.
If you don’t have one, you may create one on your computer.
- Run the command (replace the your_email@example.com with your main email address).
1 | ssh-keygen -t rsa -b 4096 -C "your_email@example.com" |
- When you’re prompted to “Enter a file in which to save the key,” press Enter. This accepts the default file location. Or you may choose your desired file location.
- When you’re prompted to “Enter passphrase (empty for no passphrase)”, please enter one password you like. You need to remember the password since it is required to decrypt the secret key. You may leave it blank, though it will be a bit unsecure.

Add the New SSH Key to ssh-agent
ssh-agent is a program to hold private keys used for public key authentication (RSA, DSA). You may need to add your newly-generated key to ssh-agent , to make sure it will be used later. Here are the steps:
- Start a new agent process in the background.
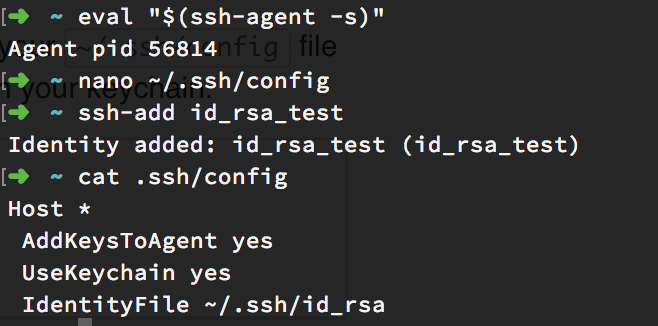
1 | eval "$(ssh-agent -s)" |
- (For macOS Sierra / High Sierra users) You will need to modify your ~/.ssh/config file to automatically load keys into the ssh-agent and store passphrases in your keychain.
1 | Host * |
- Add your key to agent. Remember to replace ~/.ssh/id_rsa with where you place it.
1 | ssh-add -K ~/.ssh/id_rsa |
Import the SSH Key on Amazon Platform
Now you have your owned SSH keys, and you will need to import it so Amazon can recognize it.
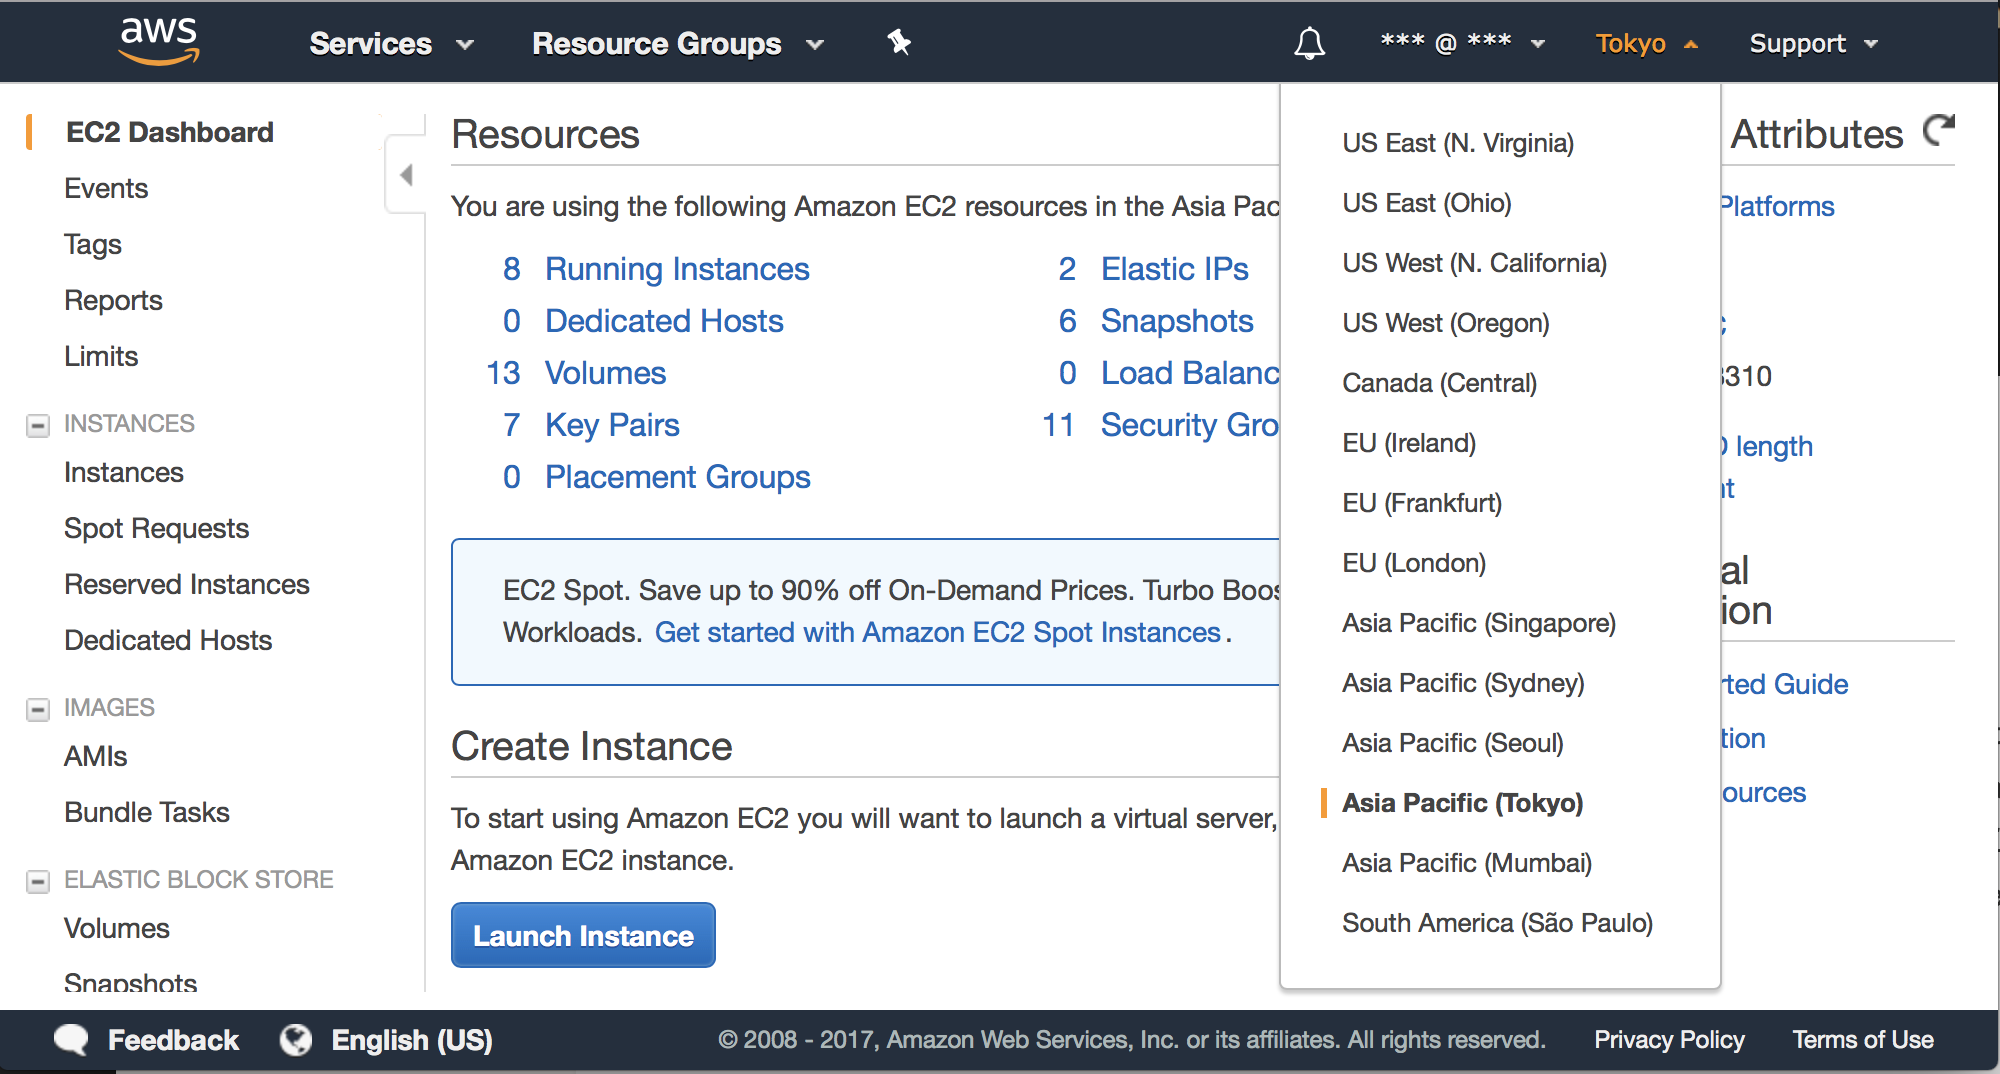
Log into your AWS Console , click the EC2 link to go to the EC2 Console . Here you need to choose one of the available regions of EC2. Since I live in China, I choose the Asia Pacific (Tokyo) region for better speed. You may choose based on your visitor origins.
Click Network & Security - Key Pairs on left sidebar. You will see a “Import Key Pair” button on top. Here you may copy using clipcopy by
1 | cat <where_is_your_public_key.pub> | clipcopy |
You will need to paste it in the popup window on AWS console.
Launch a New Instance
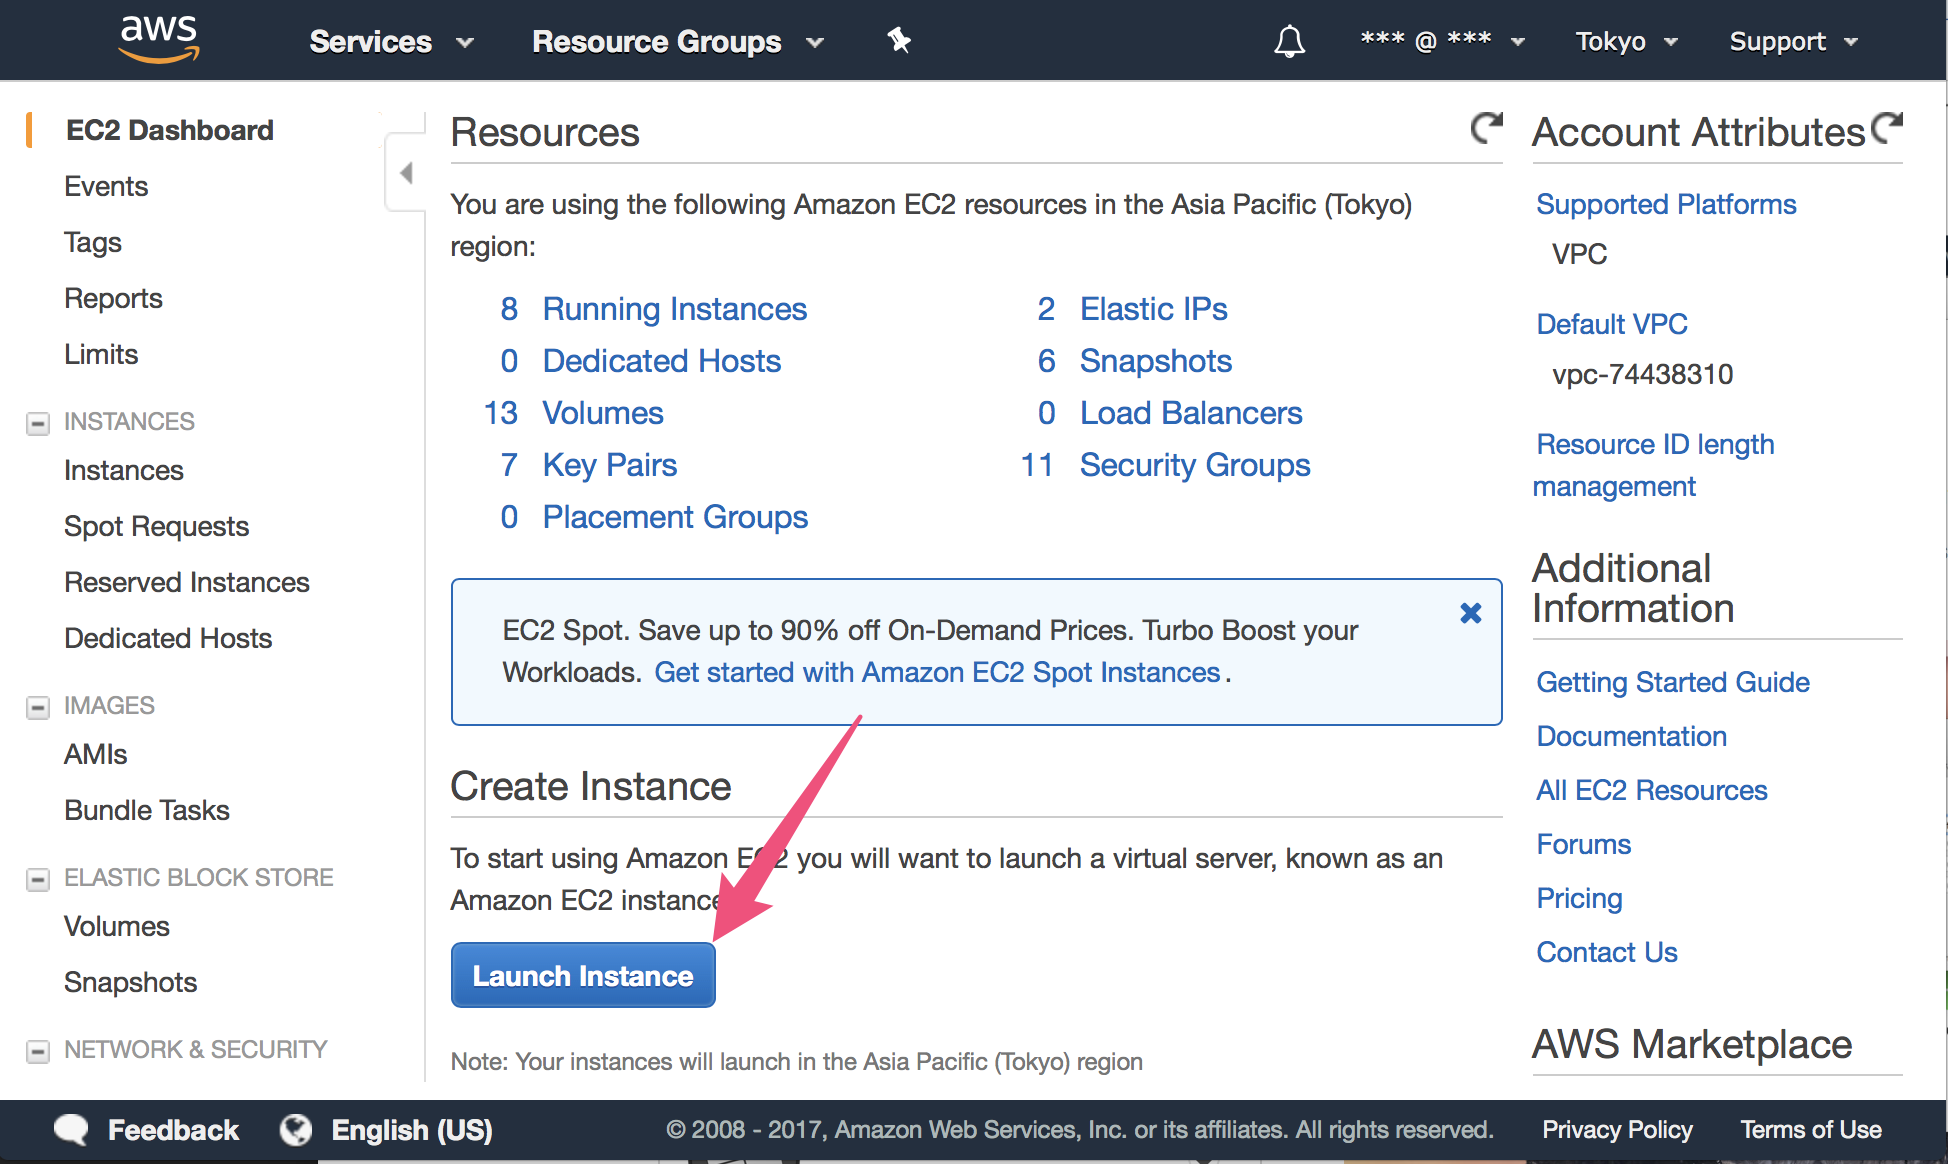
After you have imported the public key, go back to the Dashboard page. Then click the big blue button " Launch Instance ".
On the next page, you should choose an Amazon Machine Image (AMI) to run on the new EC2 Instance. An AMI is a template that contains the software configuration (operating system, application server, and applications) required to launch your instance. Here we will pick the Amazon Linux AMI, since it includes most we need.

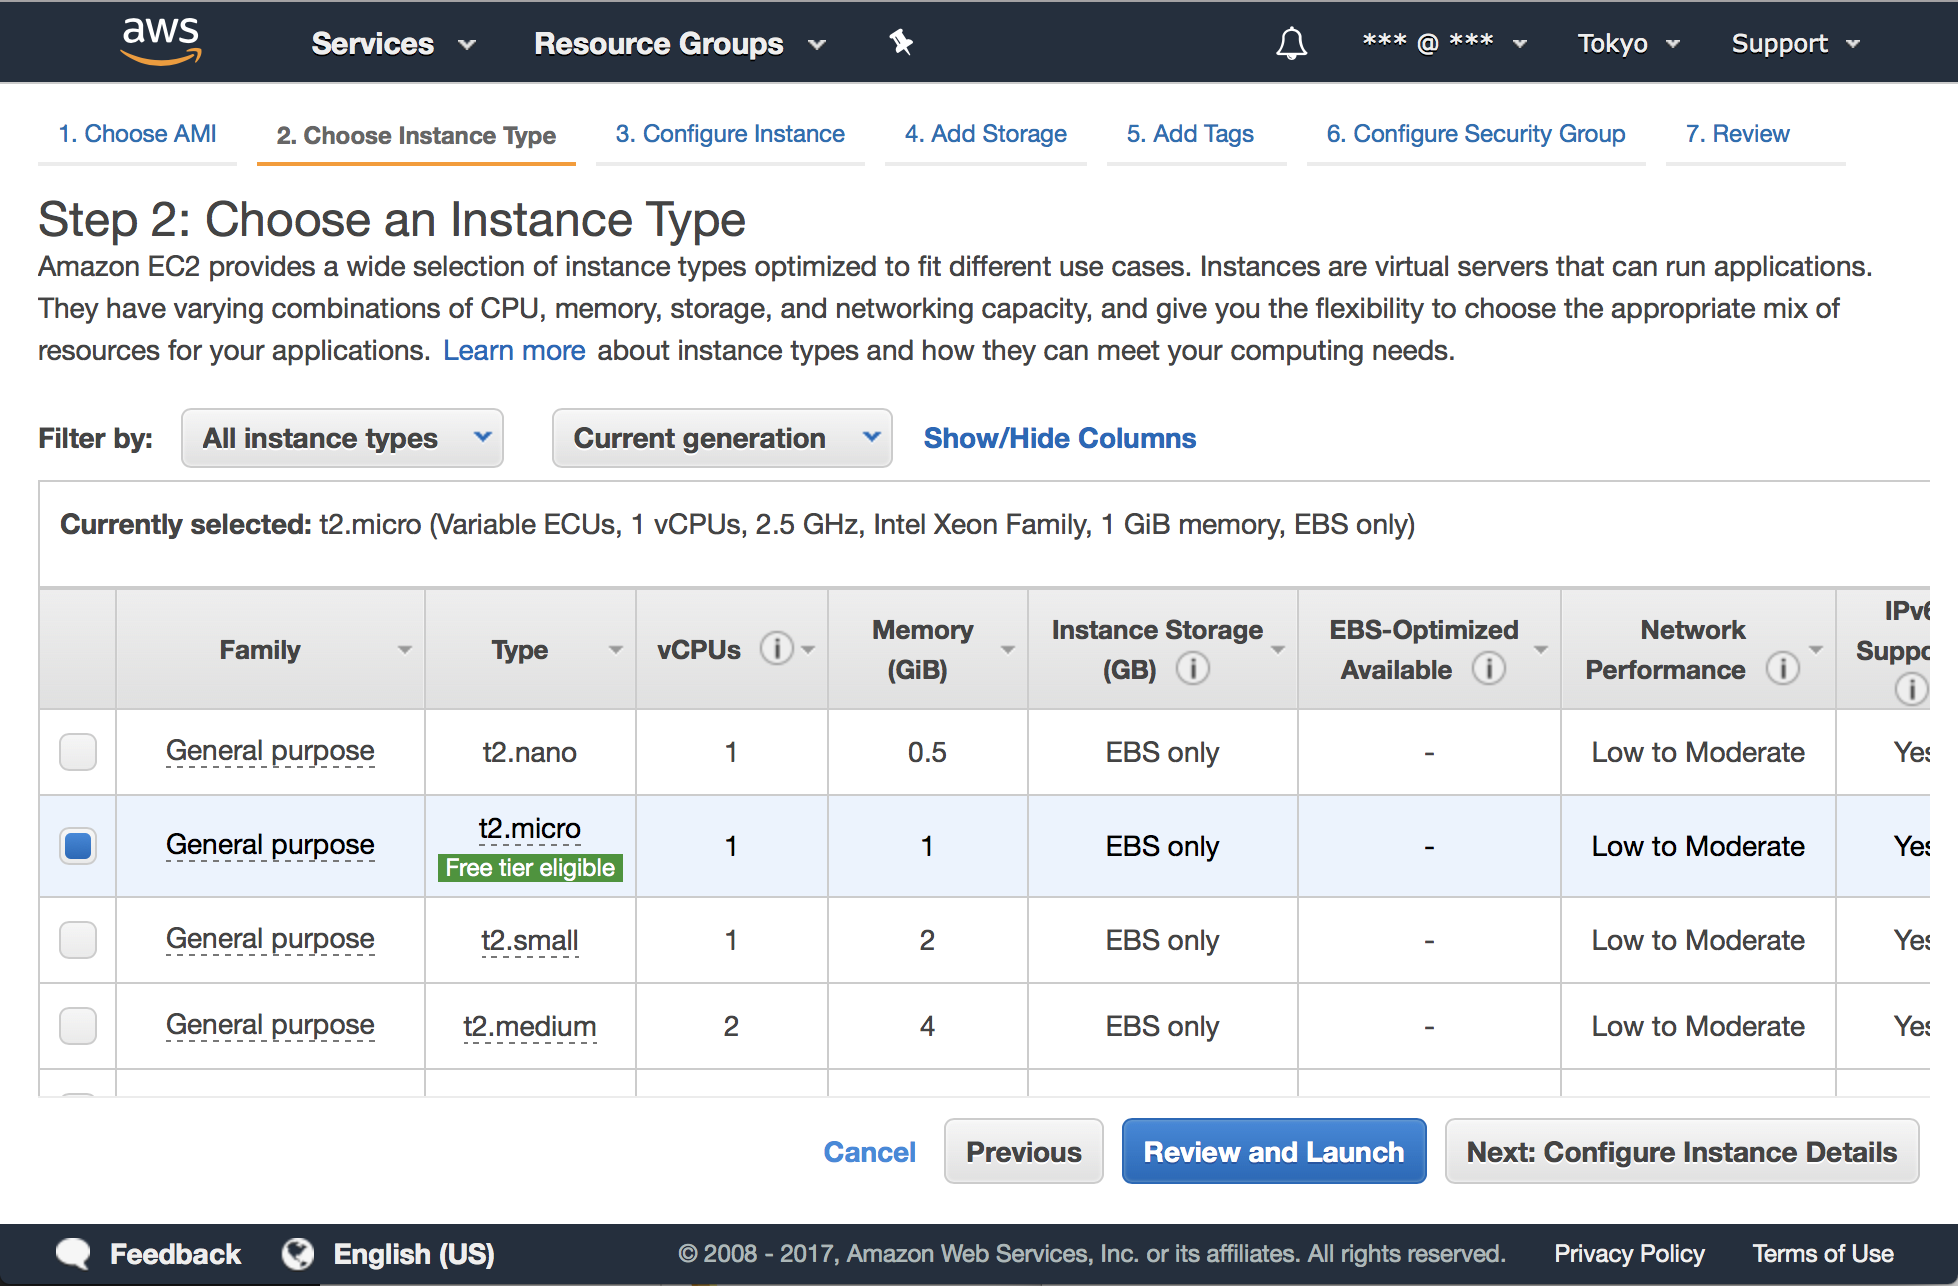
Next, choose an Instance Type, which is a combination of CPU, memory, storage, and networking capacity. Here we choose the t2.micro which provides free tier, then click on the “Next: Configure Instance Details” button. Learn more about free usage.
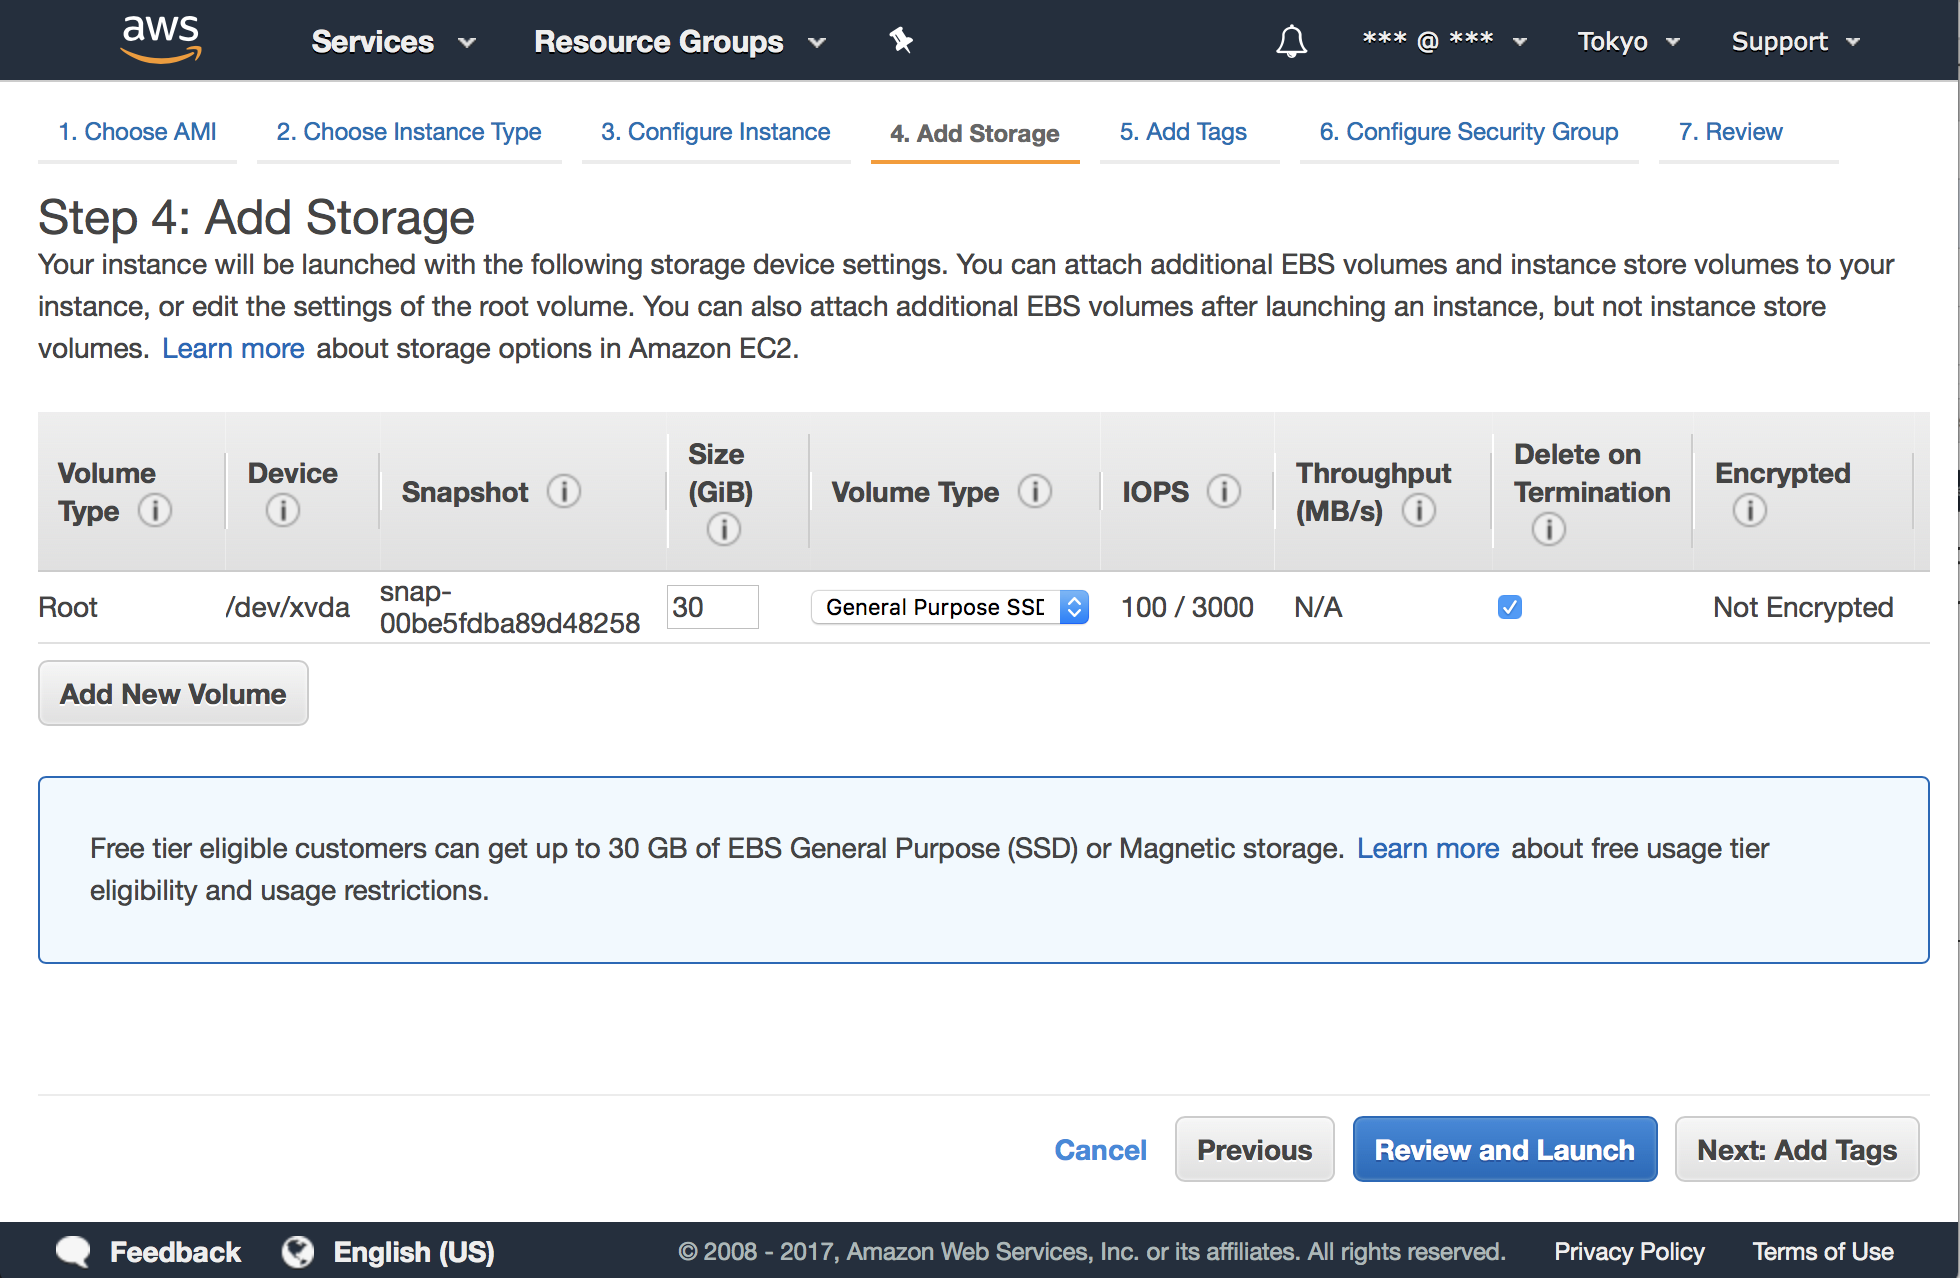
Let’s keep the default settings of Instance Details and next. We use a 30 GB EBS since the free tier provides it:
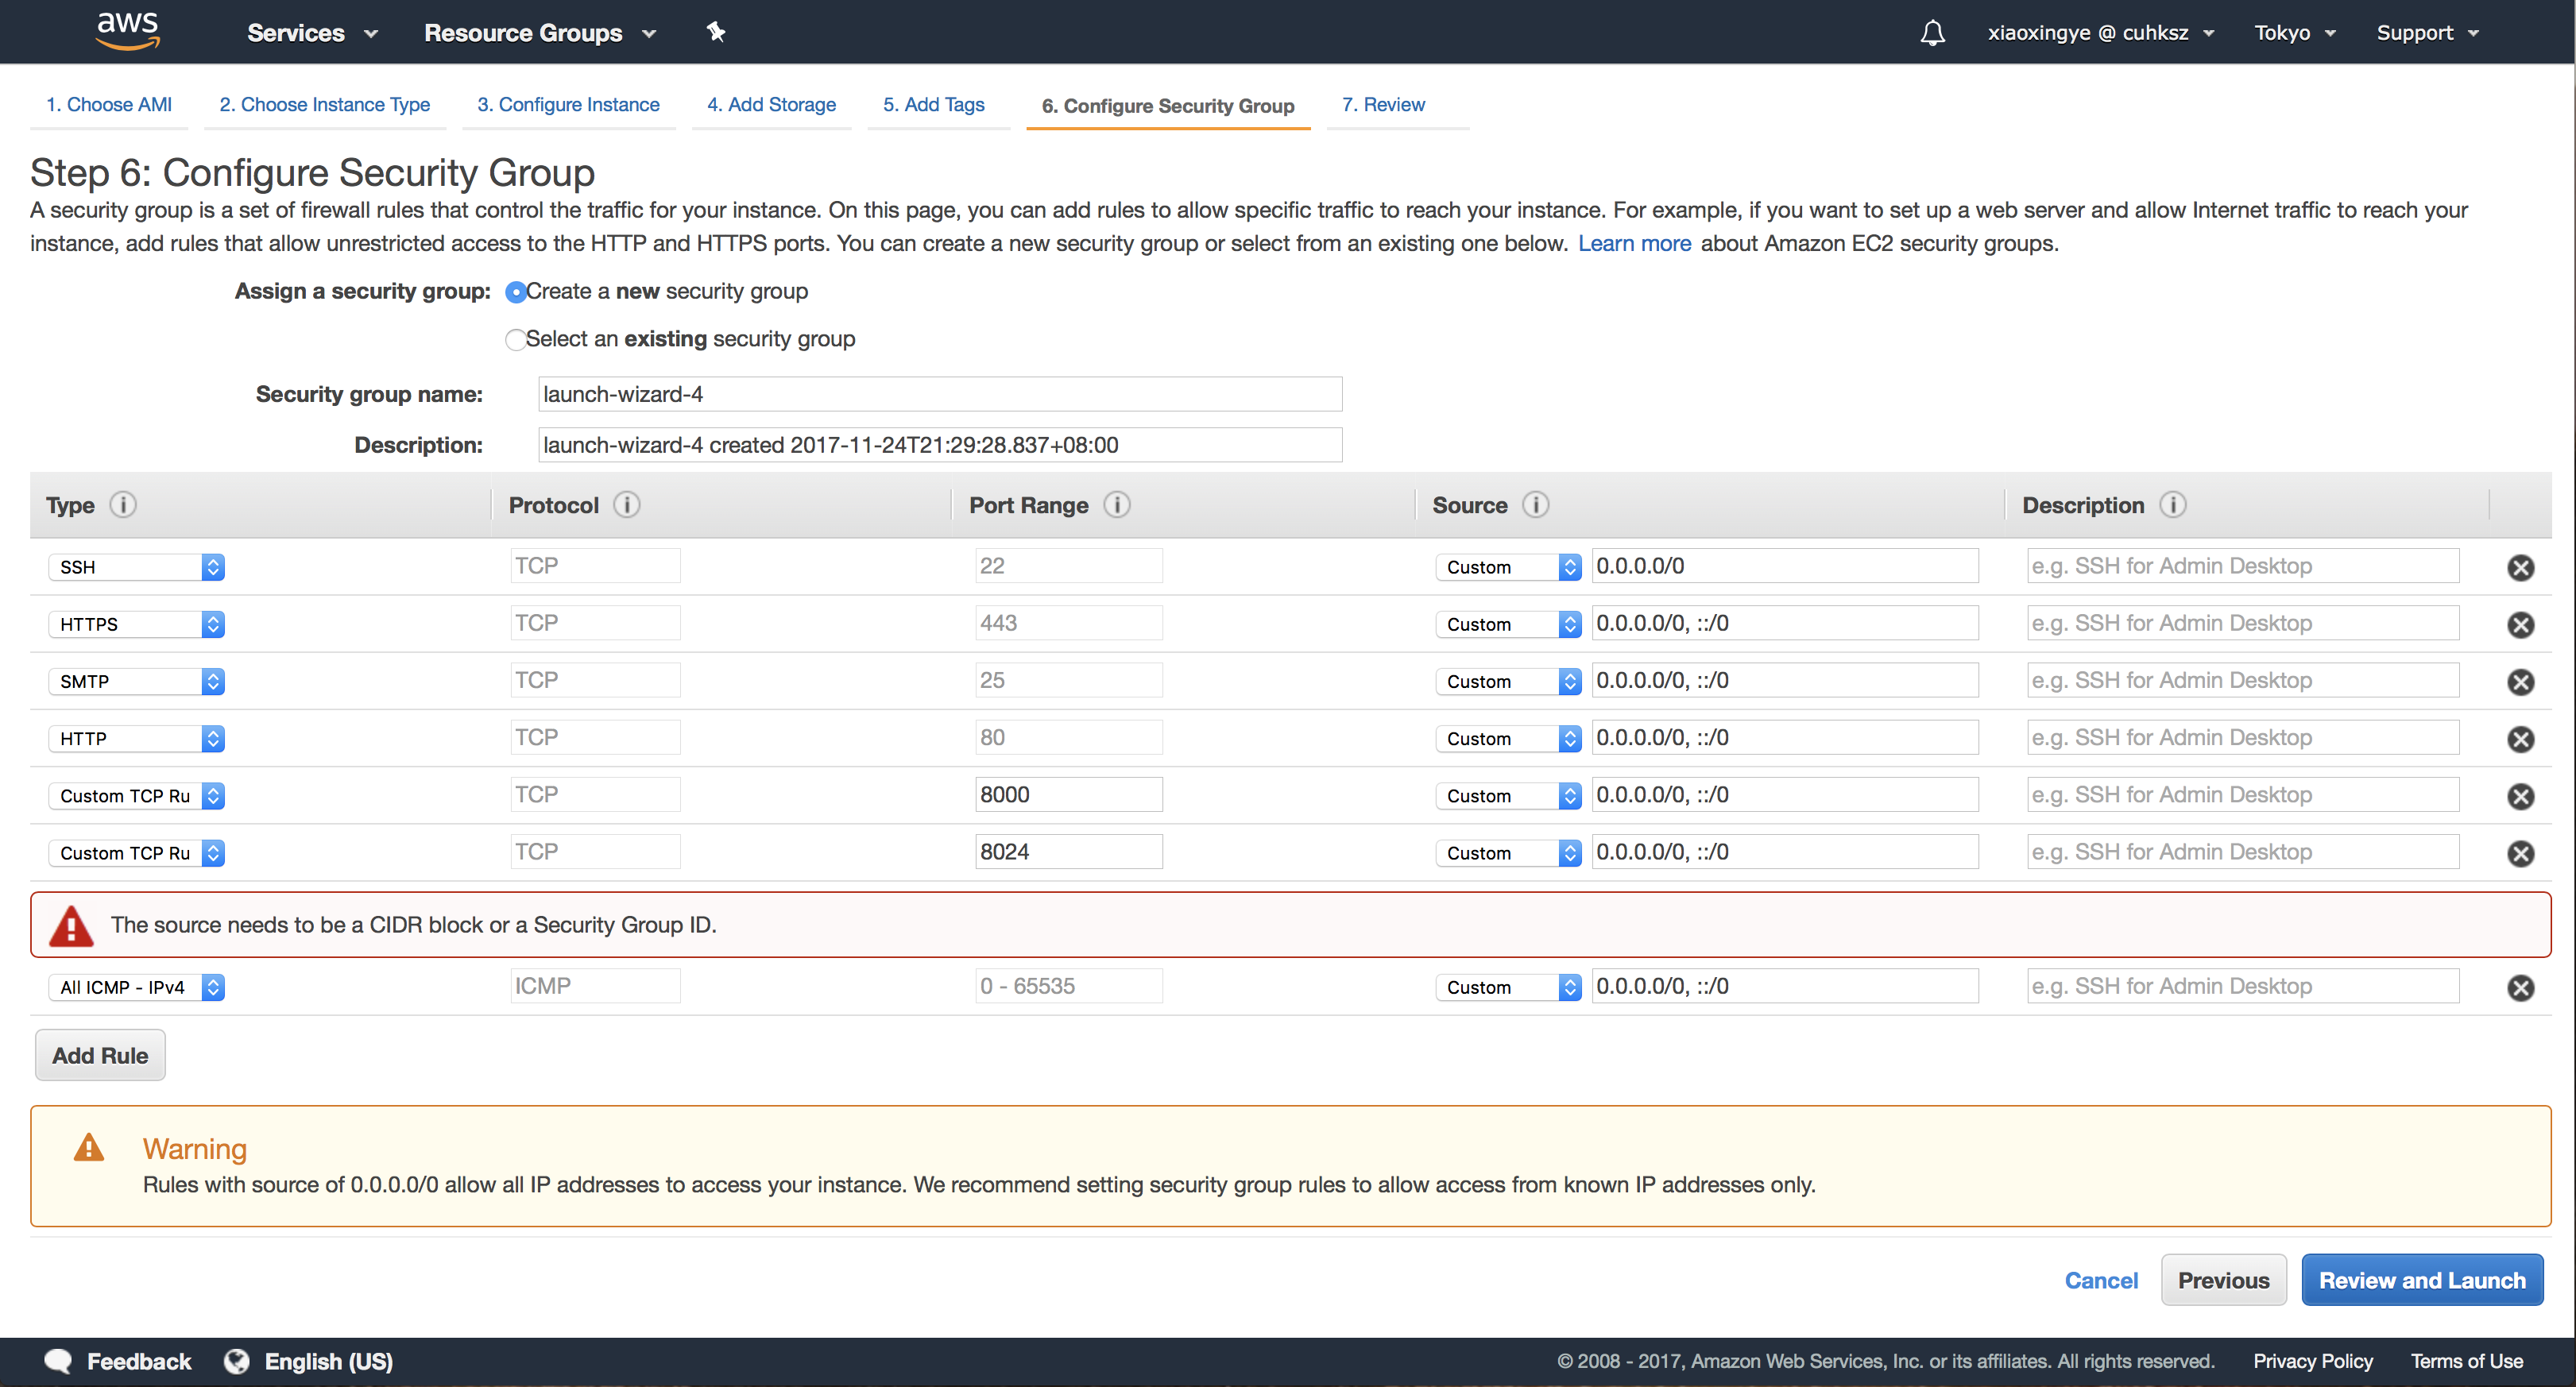
We don’t need a tag yet, so leave it blank and next to configure Security Group. A security group is a set of firewall rules that control the traffic for the instance.
Here you need to add some rules:
- Allow SSH (TCP 22) traffic from your IP address
- Allow all ICMP traffic from your IP address, to enable ping requests
- Allow HTTPS and HTTP traffic (TCP 443 and 80)
- Allow port 8000 for testing Mailman (TCP 8000)
- Allow port 8024 for LMTP (TCP 8024)
- Allow port 25 for SMTP (TCP 25)
You can also give the new security group a fancy name, like “Mailman-Security-Group”. Then click “Review and Launch”.
In the Review page, you will see all the settings you have made before. Once you ensure they are ready, click “Launch” button. You will now be prompted of choosing your key pair. Still remember what we have done before? Choose that key, and Launch.
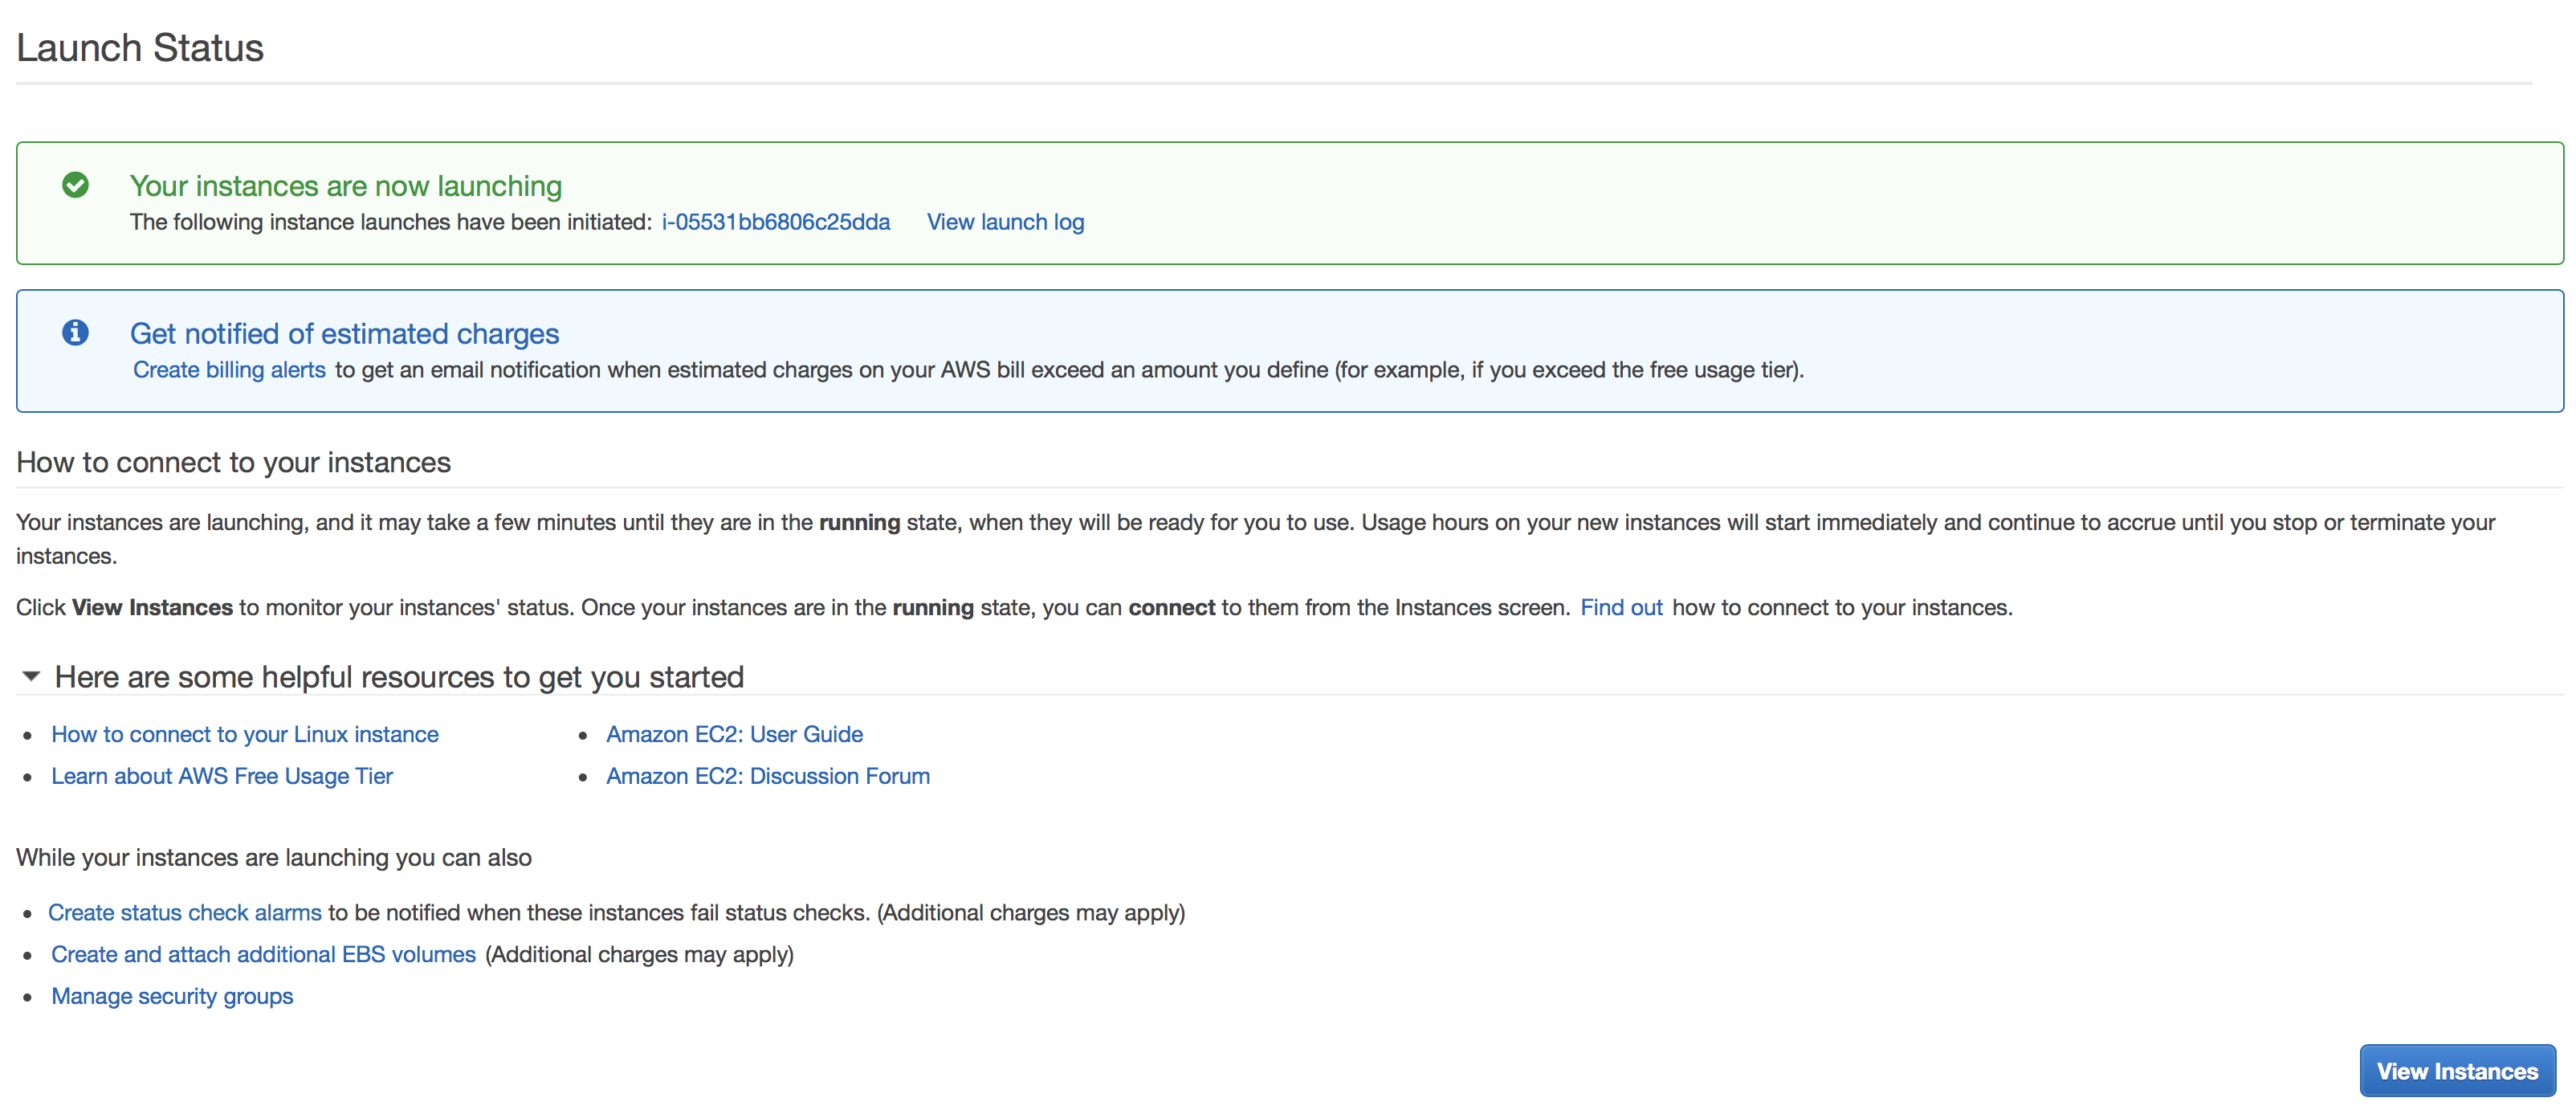
You can now view the instances and find your newly-created one after few-minute initialization.
Allocate Elastic IP
An Elastic IP address is a static IP address designed for dynamic cloud computing. An Elastic IP address is associated with your AWS account. With an Elastic IP address, you can mask the failure of an instance or software by rapidly remapping the address to another instance in your account. Read more about EIPs here .
In short, we need to ensure our mailing list service has minimal downtime. Once the instance is down, we may switch to another instance if needed. To do that, first go back to the EC2 Dashboard, and then choose Network & Security - Elastic IPs.
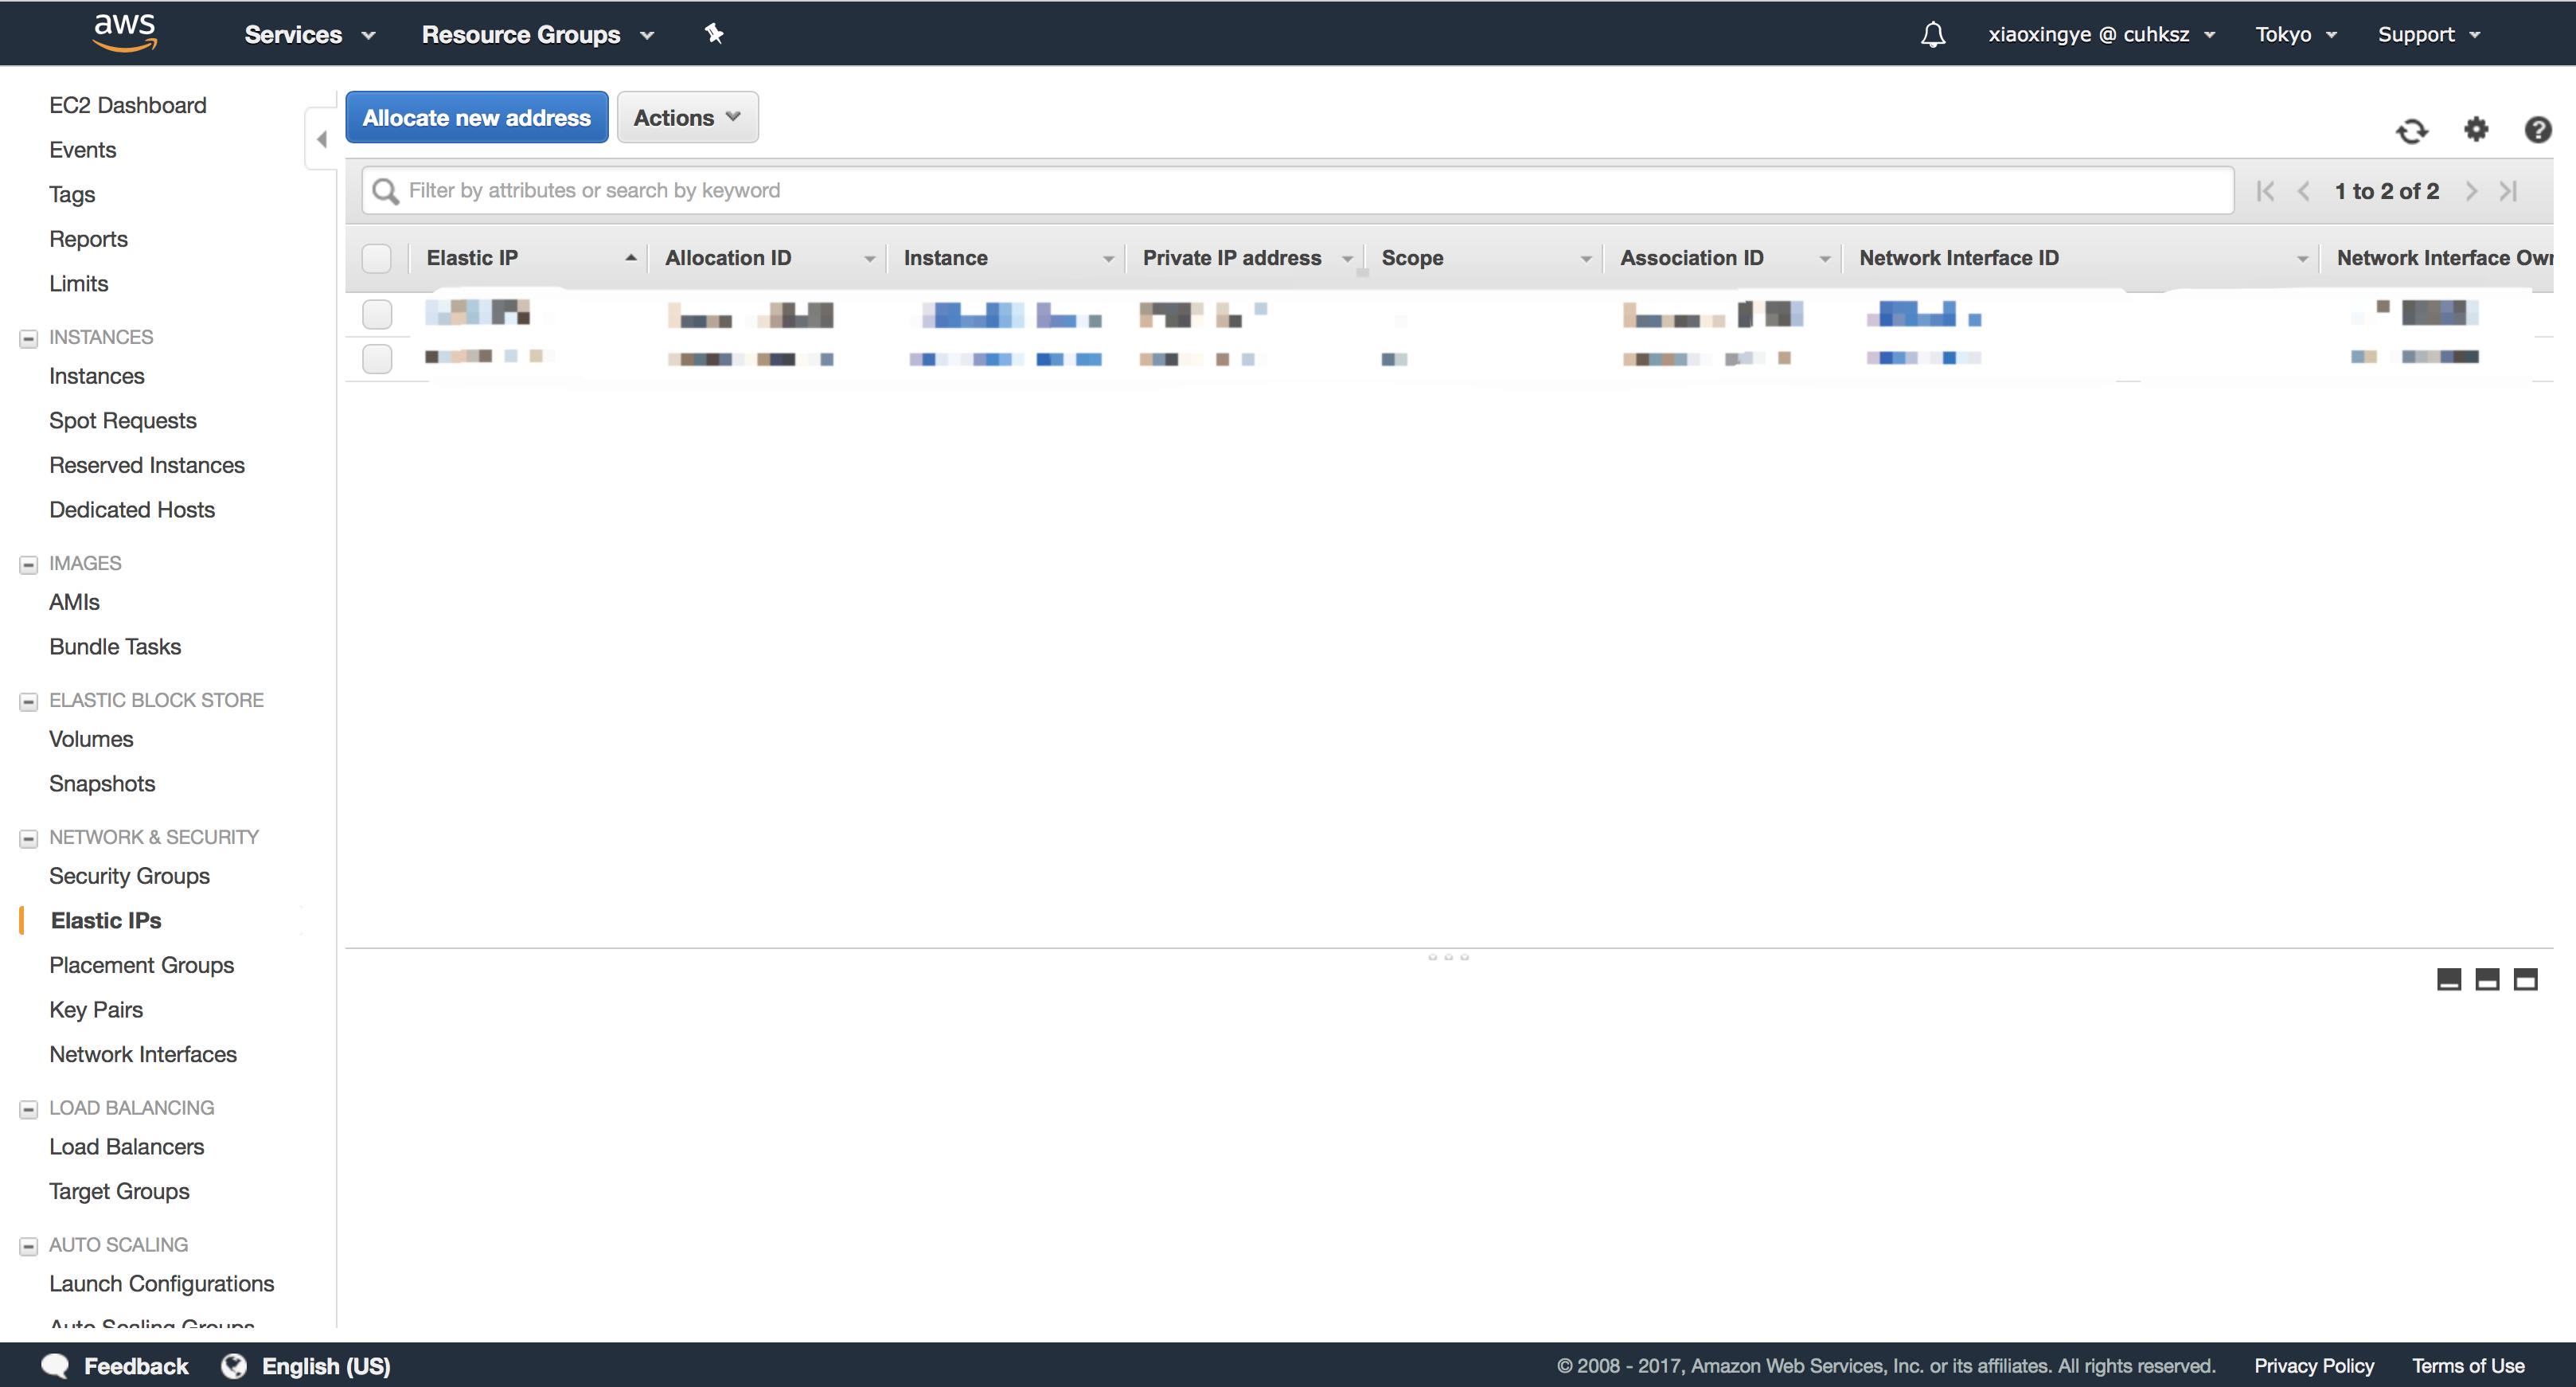
CLick “Allocate new address” button, then “Allocate”. You will now have a new IP. Remember it as
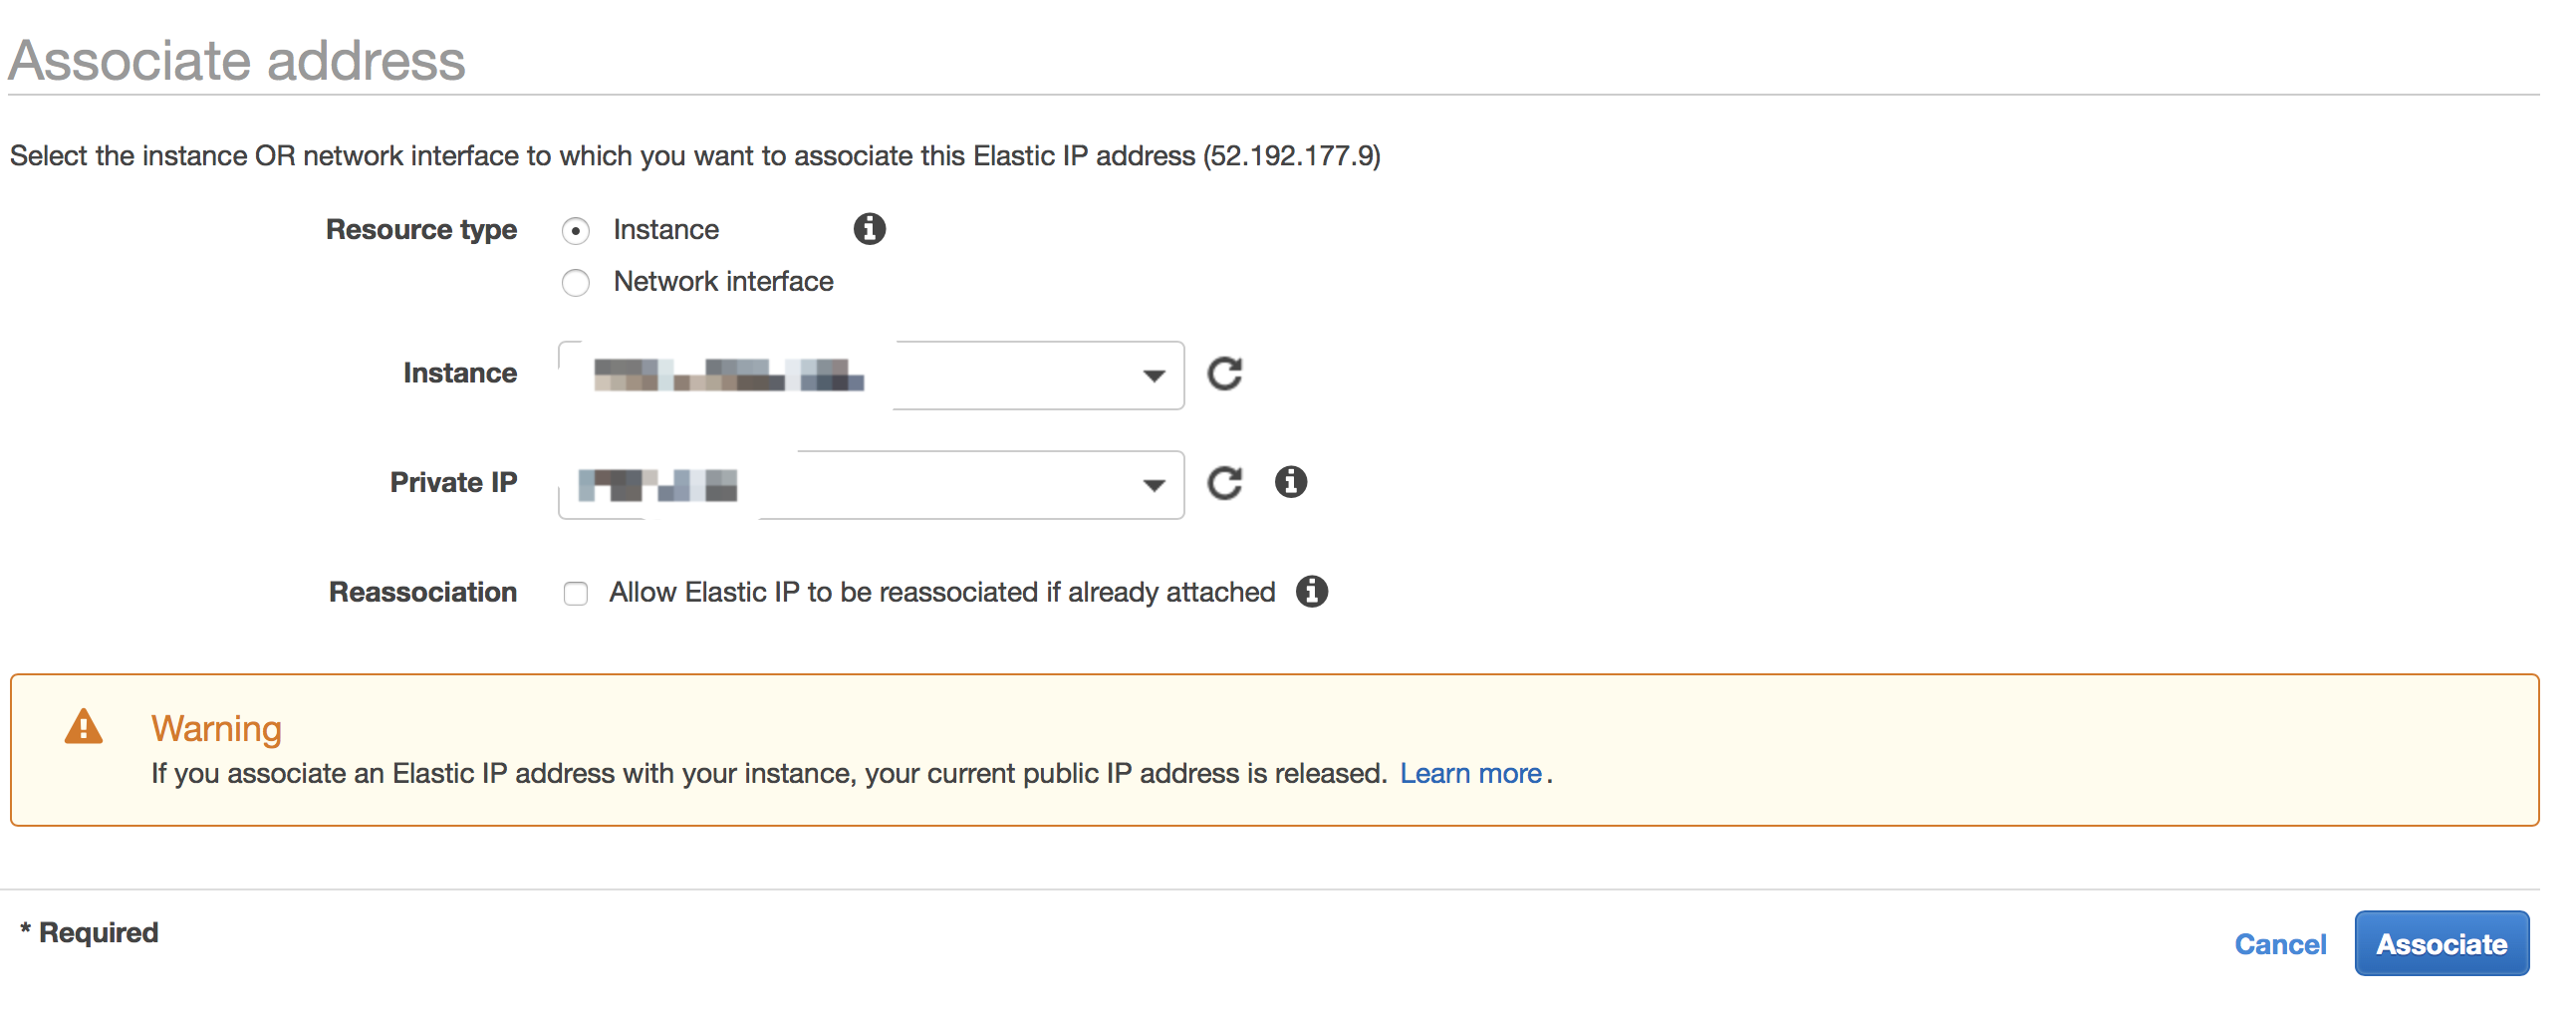
Then go back to Elastic IPs page. Choose the one you just get, then click Actions - Associate address.
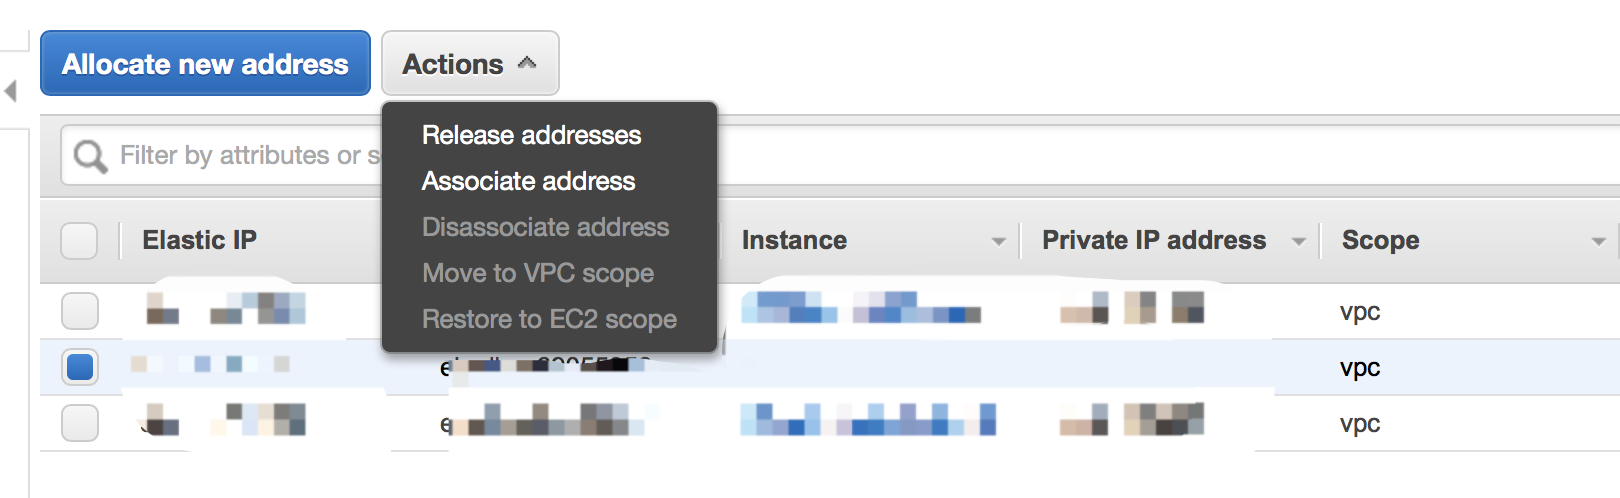
Here you need to associate the new IP to the new EC2 instance.
Try to Connect to the Instance & Update the System
You now have your EC2 instance. Excited? Now let’s connect to the instance via SSH.
The default username of the image we used (remember? Amazon Linux) is ec2-user , so we can connect using
1 | > ssh ec2-user@<EIP> |
You may be prompted to enter the password of your key. It is what you have set before. Forget the password? Go back to the most beginning of this article, and restart the works.
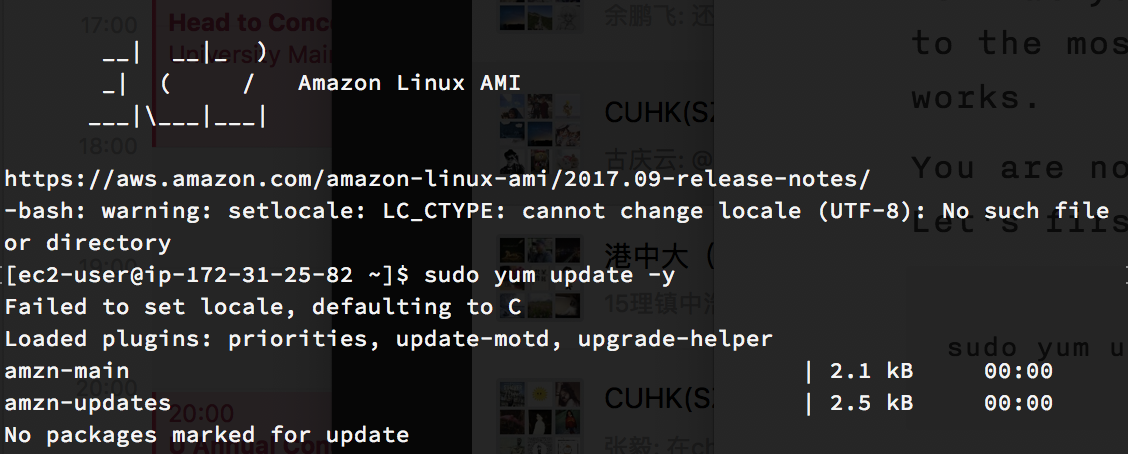
You are now in control of a fully working Linux server. Let’s first update the system to ensure security.
1 | > sudo yum update -y |
Install Docker on the Instance
The next step is to install Docker on your EC2 Instance. Go back to the SSH session we opened before, enter:
1 | > sudo yum install -y docker |
Next, add the ec2-user to the docker group so you can execute Docker commands without using sudo:
1 | > sudo usermod -a -G docker ec2-user |
You need to log out and log back to make it take effect. Enter exit to log out then log back with ssh . If nothing goes wrong, type docker info and it will return information about the Docker installation.
Now we can test the Docker installation by running the training/webapp image:
1 | > docker run -d -p 80:5000 training/webapp:latest python [app.py](http://app.py) |
Copy the last line, which is the ID of the container. Try to visit http://
1 | > docker rm <CONTAINER_ID> -f |
After we have Docker ready, we need to install Docker Compose. Compose is a tool for defining and running multi-container Docker applications. With Compose, you use a YAML file to configure your application’s services. Follow the steps:
- Check the newest Compose release number in the Compose repository release page on GitHub . Up to Nov. 24, 2017, it was 1.17.1.
- Run this command to download the Docker Compose, replace
<NEWEST_COMPOSE_RELEASE>with the version you get:
1 | > sudo curl -L https://github.com/docker/compose/releases/download/<NEWEST_COMPOSE_RELEASE>/docker-compose-`uname -s`-`uname -m` -o /usr/local/bin/docker-compose |
- Add executable permissions to the binary:
1 | > sudo chmod +x /usr/local/bin/docker-compose |
- Install command-line completion (Check here if you use zsh):
1 | > sudo curl -L https://raw.githubusercontent.com/docker/compose/<NEWEST_COMPOSE_RELEASE>/contrib/completion/bash/docker-compose -o /etc/bash_completion.d/docker-compose |
- Test the installation:
1 | > docker-compose --version |
DNS Setting
Now you have your instance, but before we head to the mailman part, let’s bind a domain to the instance. The domain will be used as the address of mailman-web and the email address (the part after @).
Assuming we are using lists.example.com as the domain, you should set a A DNS record of lists.example.com to the Elastic IP, then a MX record of lists.example.com , also to the Elastic IP.
Configure Amazon SES
Email is a complicated thing, especially when we are talking about delivery rate. It greatly depends on the reputation of your IP, your domain, and your contents. To ease a little burden, we will use Amazon SES here. Amazon SES, short for Amazon Simple Email Service, enables you to send and receive email using a reliable and scalable email platform.
Verify Your Domain
SES is also a region-based service (like EC2), but it is not available in Asia Pacific (Tokyo) yet, and therefore we choose US-East-1 (US East (N. Virginia)) as example here.
Let’s navigate to the SES Management Console . Here you will see some introduction to SES, and a sidebar indicating all features you can use. But before we can send emails through SES, we need to verify our domain.
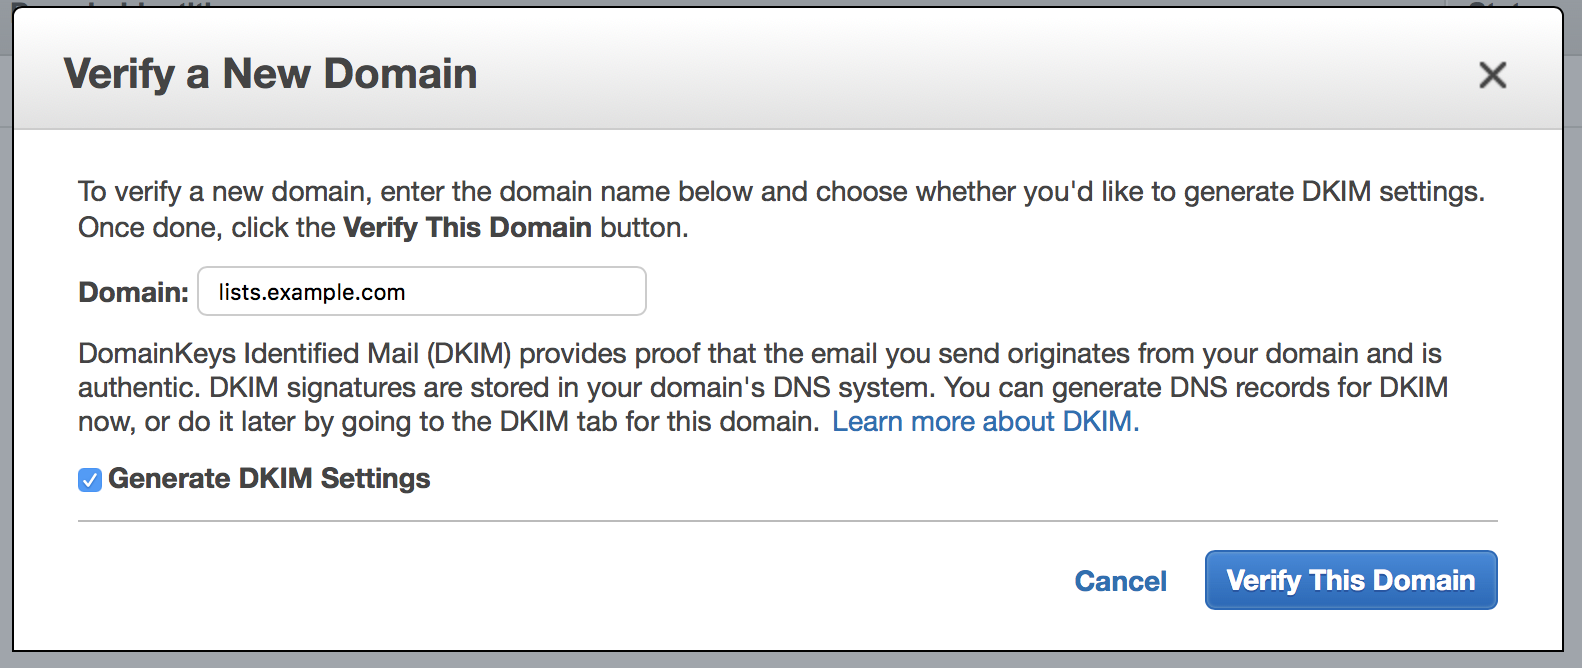
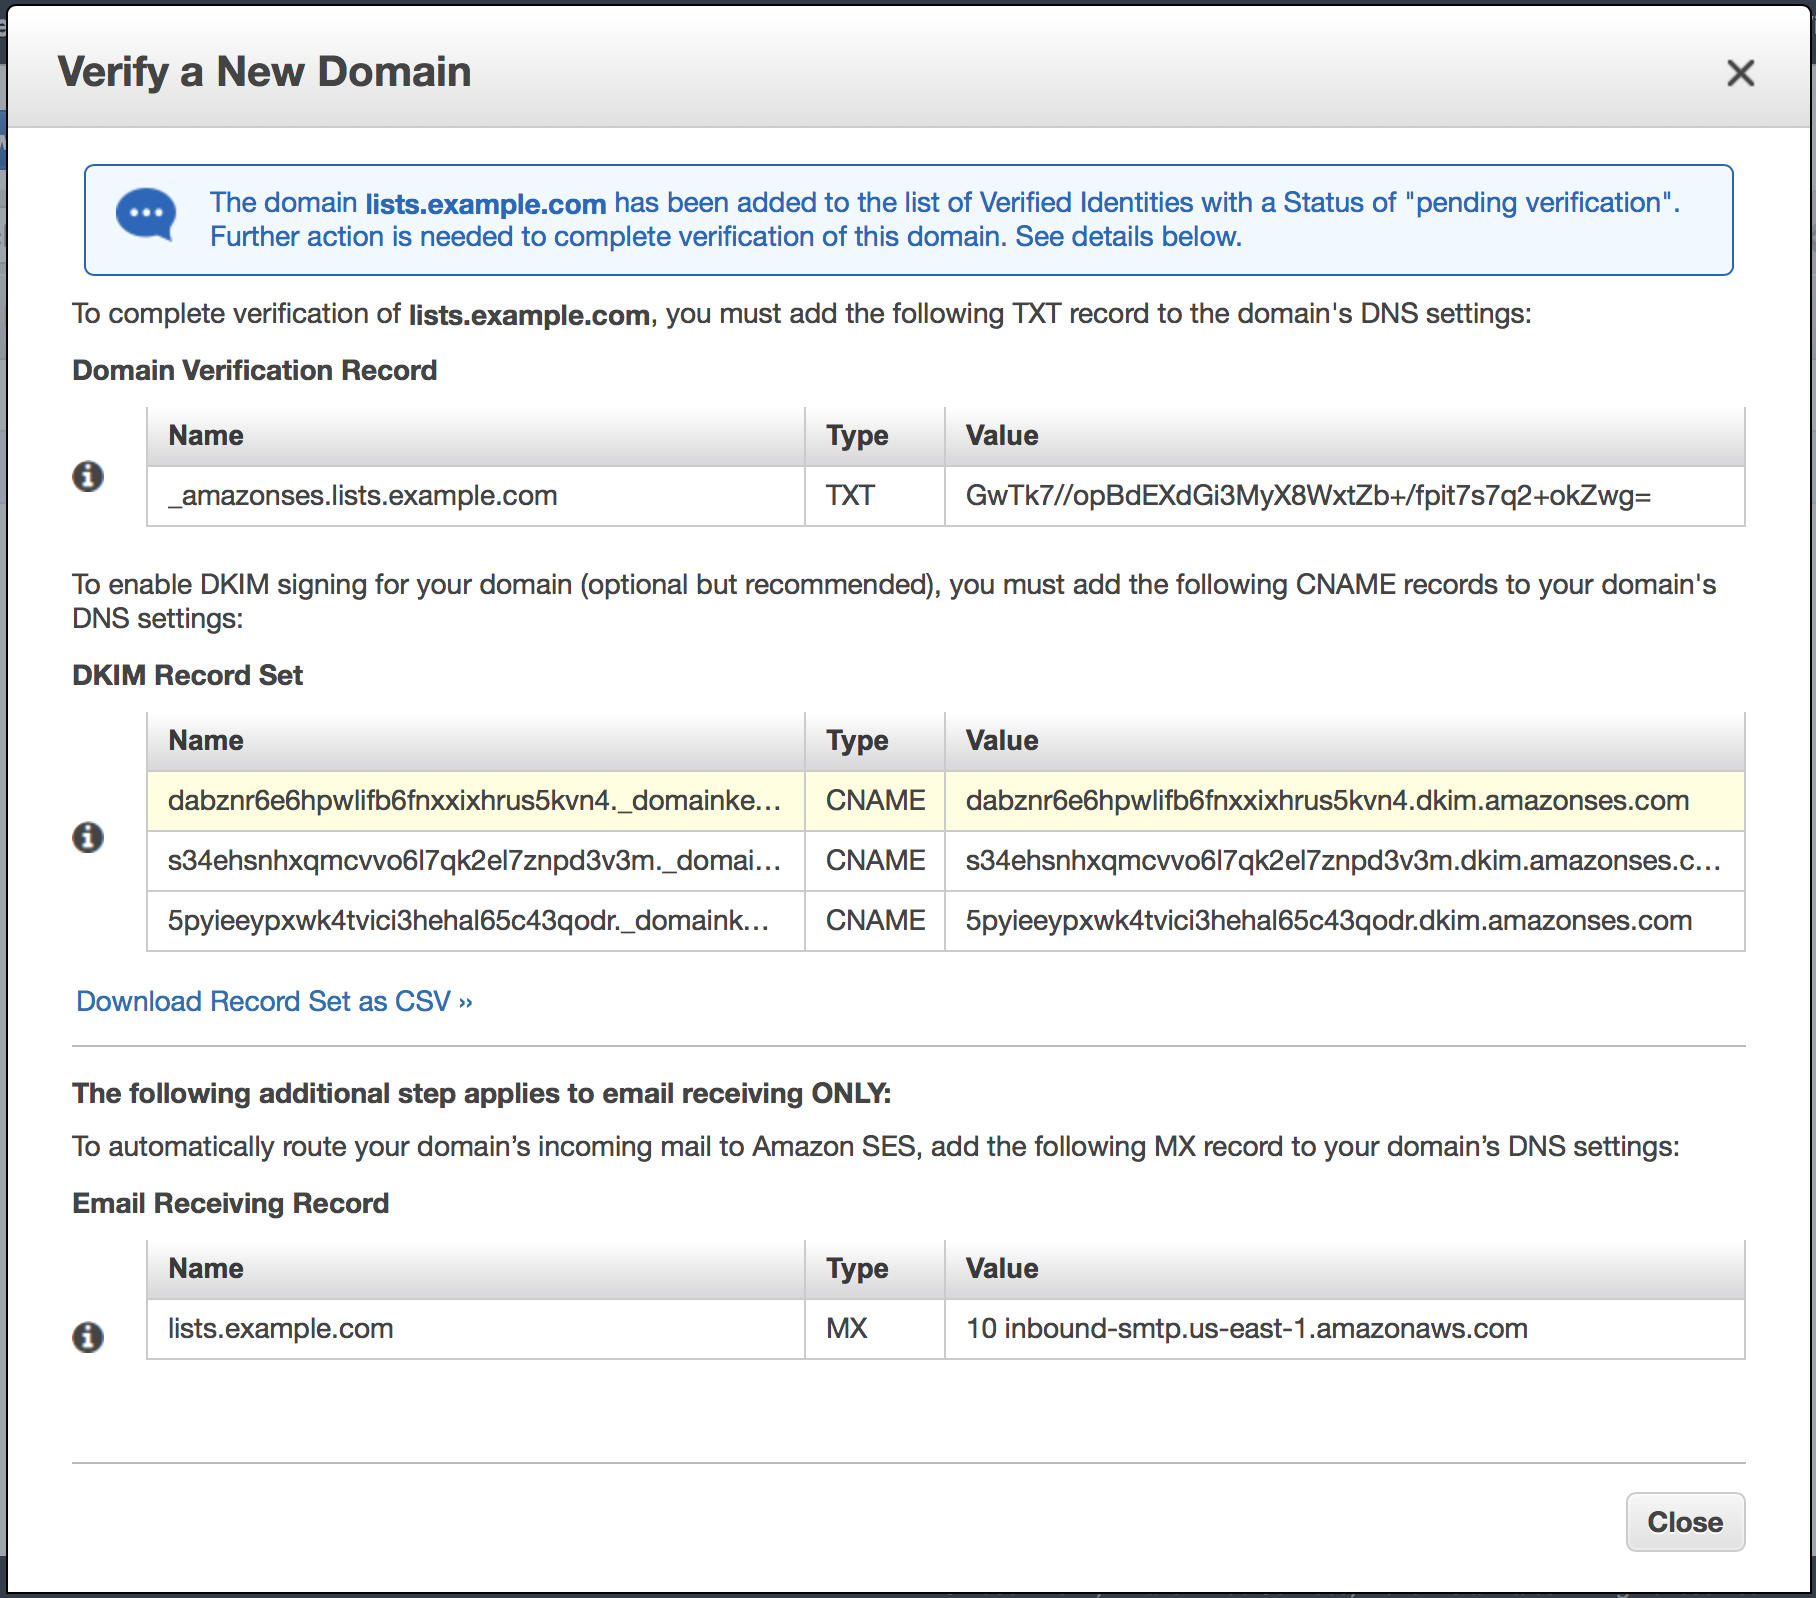
Click the “Identity Management - Domains”, and “Verify a New Domain” in the right panel. In the modal window, enter the domain you set before ( lists.example.com here), and remember to select “Generate DKIM Settings”.
What is DKIM? DomainKeys Identified Mail (DKIM) provides proof that the email you send originates from your domain and is authentic. It is a way to increase delivery rate.
After you enter the domain, click “Verify This Domain”. A new modal window will show, with a bunch of DNS records you need to set. There is a “Download Record Set as CSV”, and you can download it since in the modal window the names and values. Then you should go to your DNS provider, set the required records (Note: only Domain Verification Record and DKIM Record Set, since we don’t need SES to receive emails).
All DNS records shall look like this (Screenshot from Cloudflare):
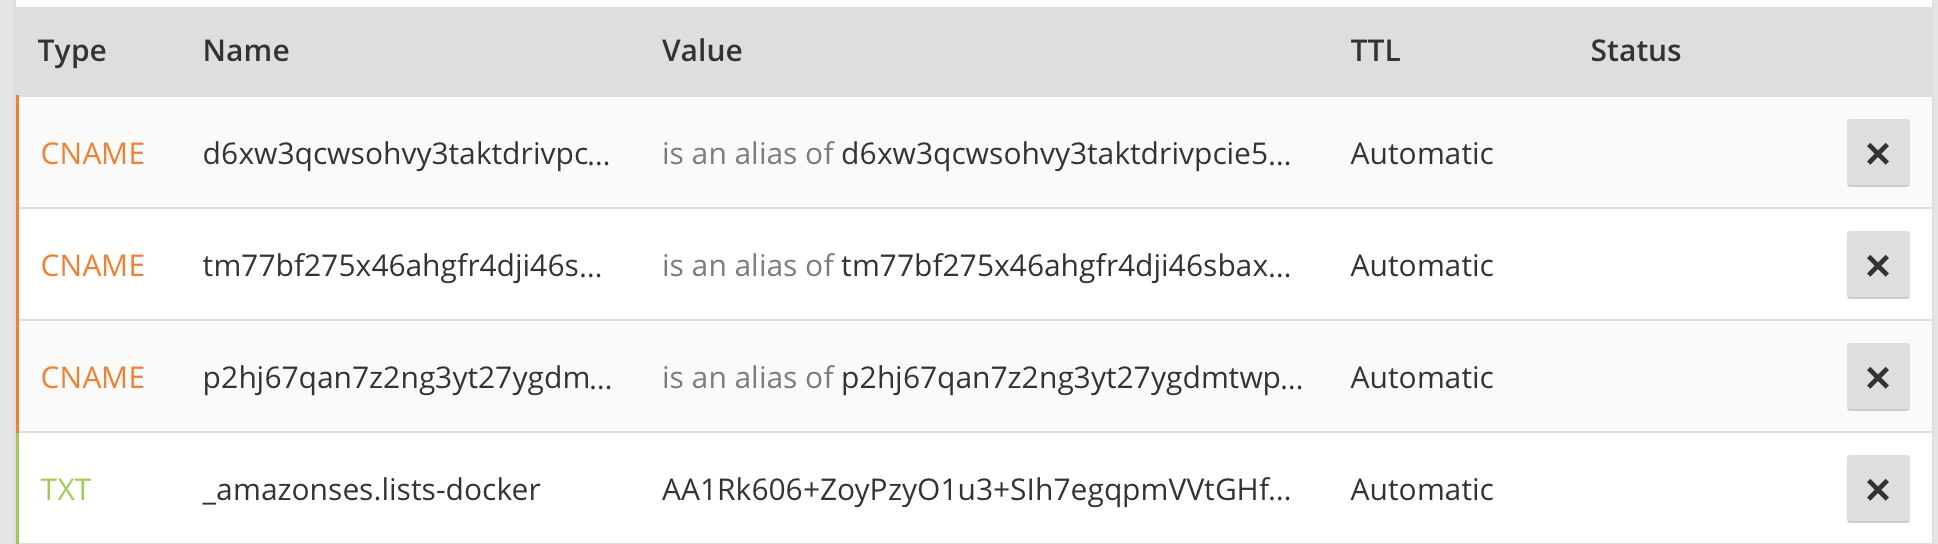
If you successfully set all records, the “pending verification” will become a green “verified”.

Add a Verified Email Address
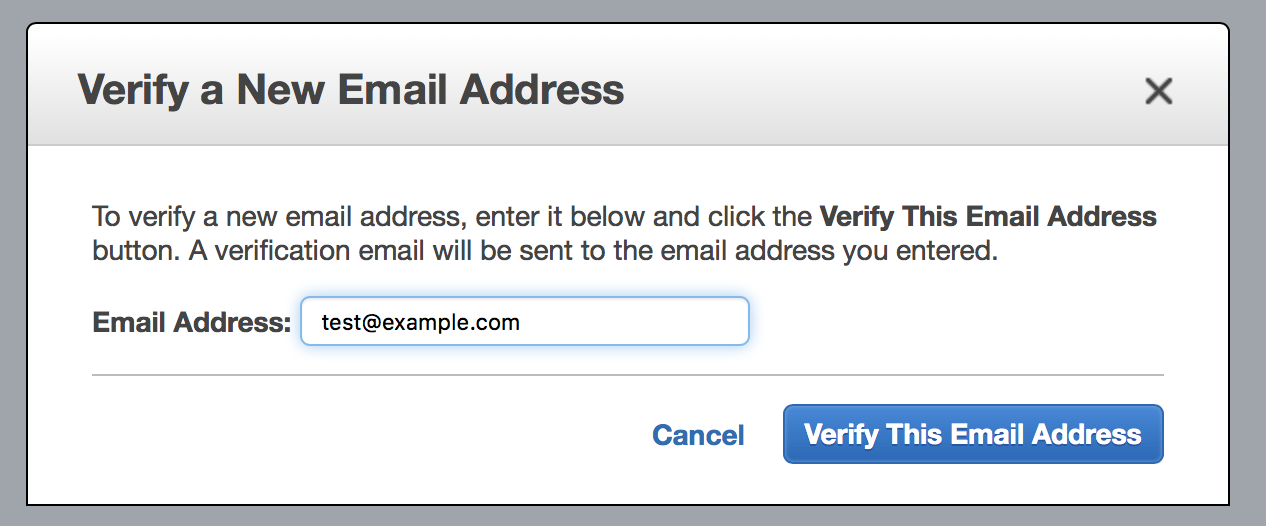
Well, by default, all new accounts are in sandbox mode, which means you can only send emails to the email addresses that you have verified. Before we request a sending limit increase, we should fully test our system first. So, let’s add a verified email address.
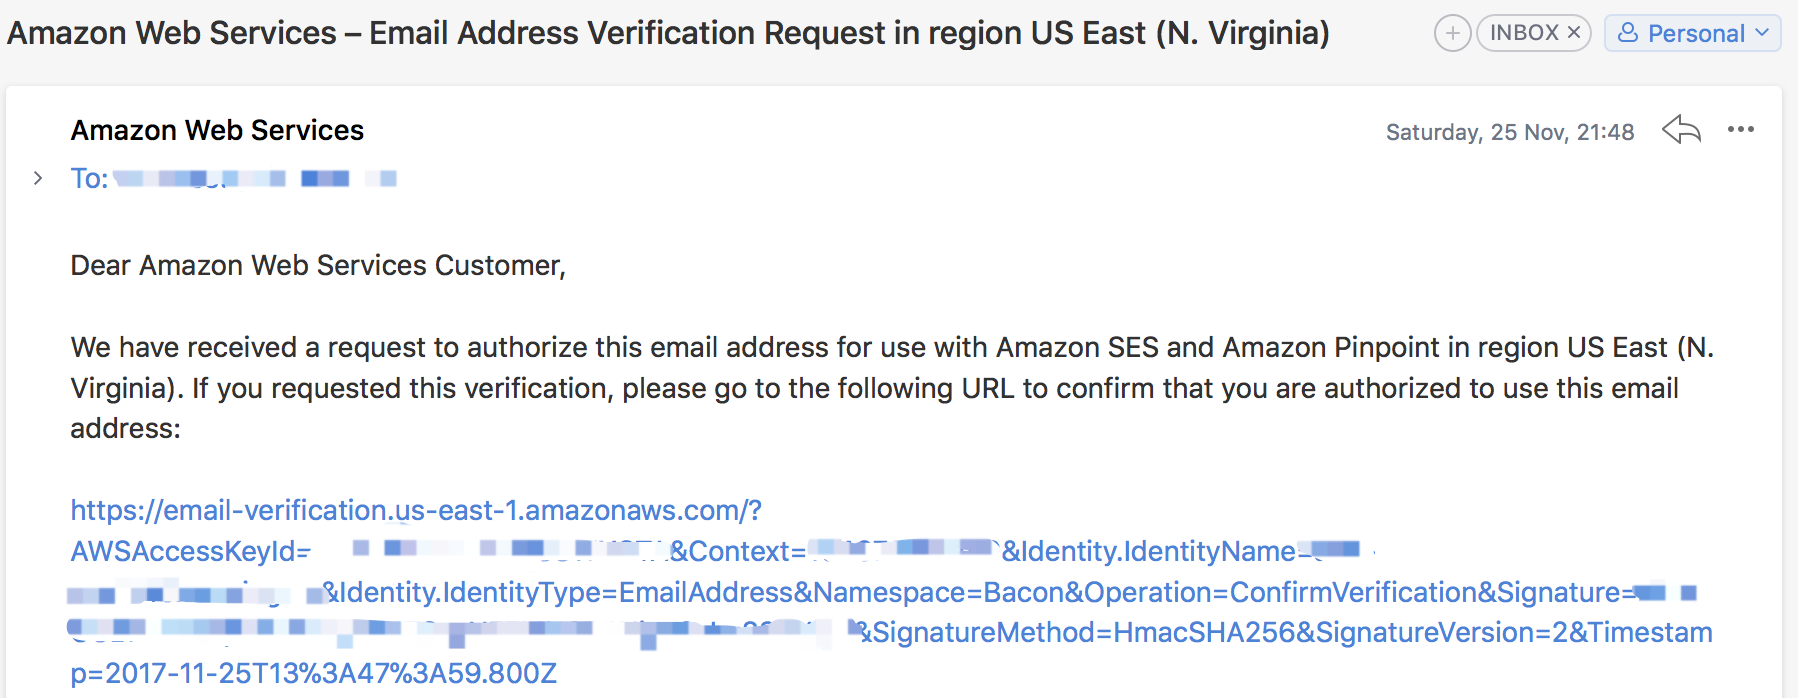
First go to “Identity Management - Email Addresses”. Here you will see a “Verify a New Email Address”. Yes, click it and enter your owned email address ( test@example.com here). Amazon will send a verification email and you need to open it and complete the verification process.
Obtain SMTP Credentials
You need to obtain your SMTP user name and password in order to send email via mailman. The SMTP credentials are different from your AWS credentials. To obtain it, let’s go back to the SES Management Console, and click the “Email Sending - SMTP Settings”. You will see some instruction on the right.
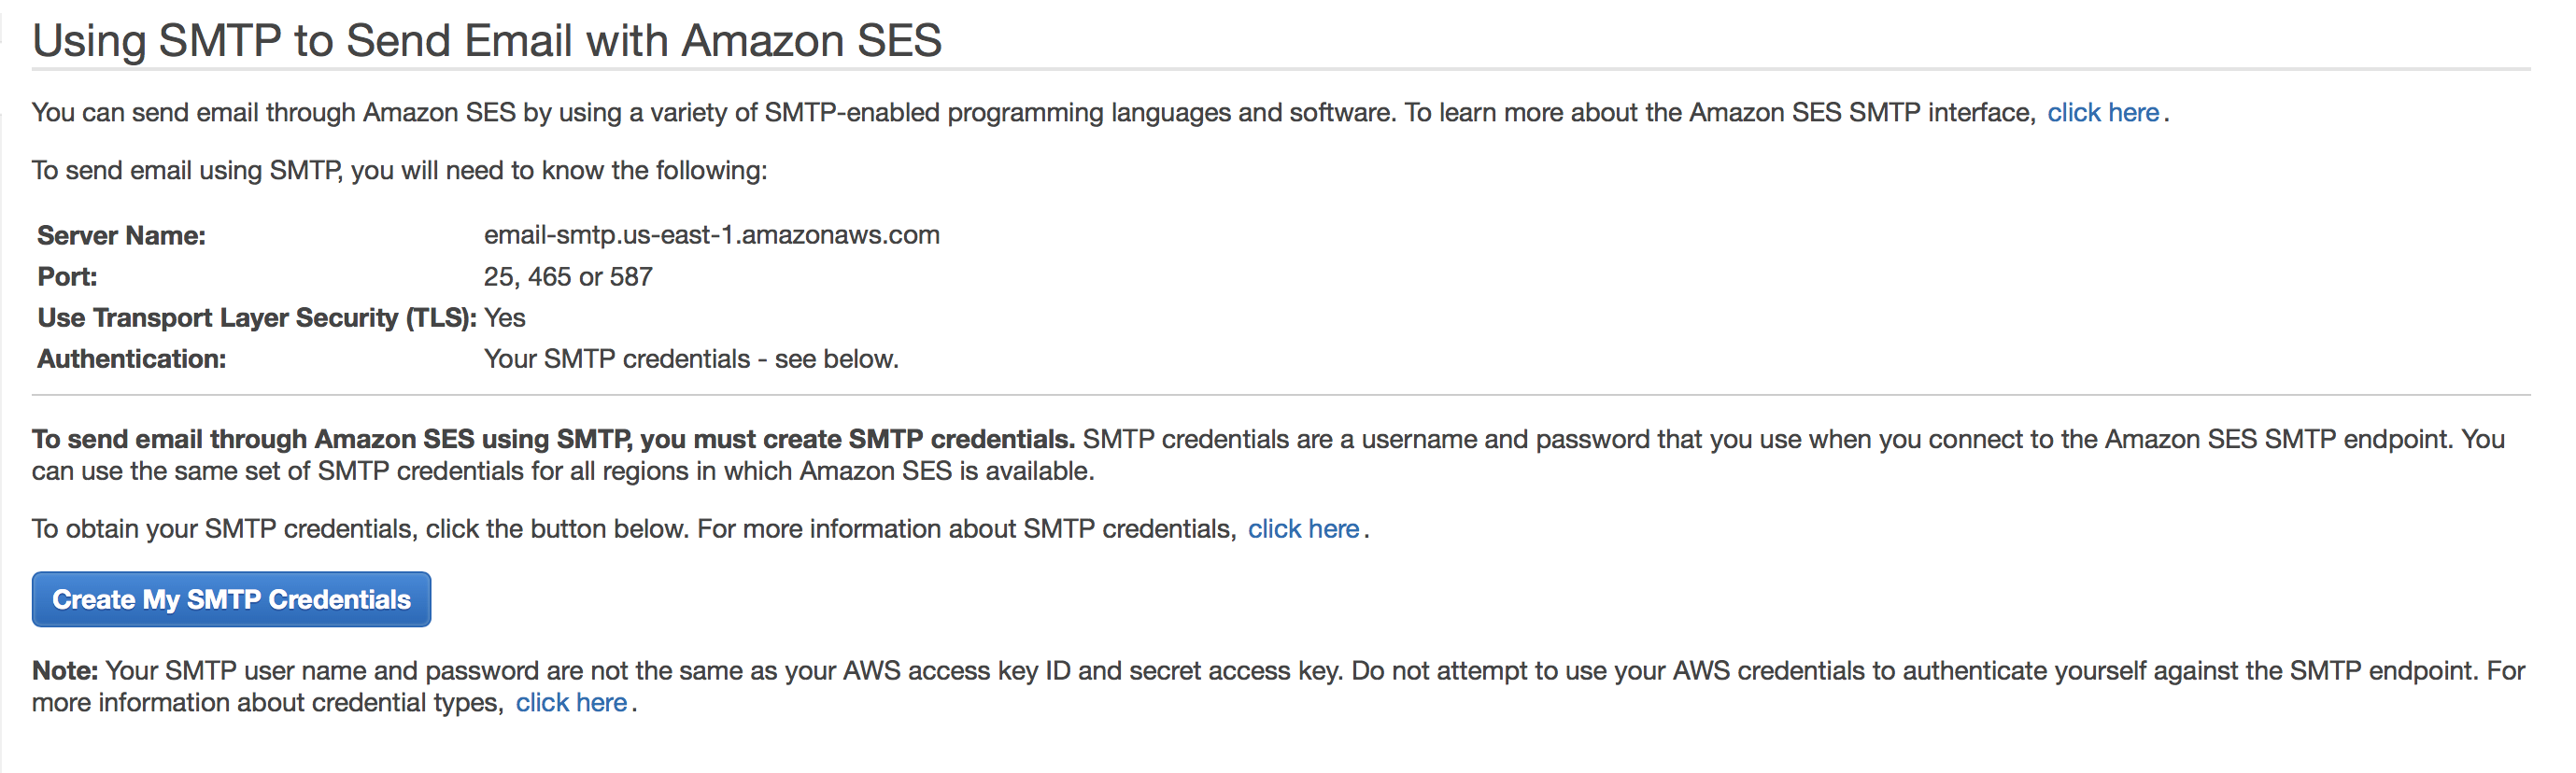
It shows the SMTP server name, port and TLS settings. Now click the “Create My SMTP Credentials”. YOu will be redirected to IAM Management Console, where you can create an IAM user for SMTP authentication with Amazon SES. Here a new username is predefined but you can use whatever you like. Let’s make it example-smtp here. Then you will see this page:

As instructed, download the credentials which will be used later.
Install Postfix & Configure It
Now let’s go back to the SSH session (if your session was closed, just re-open one).
To use Postfix, you need to first remove sendmail and install postfix.
1 | > sudo yum remove sendmail -y |
Then, edit the postfix main config file /etc/postfix/main.cf using any editor you like (for example, nano ). Add the following lines to the end of the file. Remember to replace email-smtp.us-west-1.amazonaws.com in the example above with the SMTP server name shown before.
1 | relayhost = [email-smtp.us-east-1.amazonaws.com]:587 |
Now, open the master.cf file.
1 | > sudo nano /etc/postfix/master.cf |
Locate the following line -o smtp_fallback_relay= and comment it (by placing a # (hash) character at the beginning). Save and close it.

Still remember the SMTP credentials? It is now time to use it. Open (or create) a new file /etc/postfix/sasl_passwd .
1 | >sudo nano /etc/postfix/sasl_passwd |
Add the following line to the file. Replace the USERNAME and PASSWORD with the REAL information:
1 | [email-smtp.us-east-1.amazonaws.com]:587 USERNAME:PASSWORD |
Now create a hashmap database file containing the SMTP credentials by:
1 | > sudo postmap hash:/etc/postfix/sasl_passwd |
The password files created are not encrypted, but you can use the system access control feature to restrict access:
1 | > sudo chown root:root /etc/postfix/sasl_passwd /etc/postfix/sasl_passwd.db |
Tell Postfix where to find the CA certificate (needed to verify the Amazon SES server certificate).
1 | > sudo postconf -e 'smtp_tls_CAfile = /etc/ssl/certs/ca-bundle.crt' |
Restart the Postfix server:
1 | > sudo postfix stop; sudo postfix start |
Well, you have finished an important step! Now let’s send a test email. Type the following line at the SSH session, remember to press Enter after each line, and replace From and recipient address with your real address (From address should be
1 | > sendmail -f sender@example.com recipient@example.com |
Check the mailbox associated with the recipient address. If the email does not arrive, check your junk mail folder. If you still cannot locate the email, check your system’s mail log (typically located at /var/log/maillog ) for more information.
Getting Ready for Containers
GNU Mailman 3 is actually a suite of softwares, including Mailman Core, Mailman Client, Postorius, and Hyperkitty. The normal installation is very complicated (I tried before. See my repo here ). But luckily, we can use Docker. Abhilash Raj maintains container images for Mailman 3, which you can use directly without having to go through all the steps to download dependencies and configuring Mailman.
To run the containers, we first need to clone the docker-mailman repo, which contains all docker compose files we need.
1 | > git clone https://github.com/maxking/docker-mailman && cd docker-mailman |
The default compose file do these things:
- Run a wsgi server using
[uwsgi](https://uwsgi-docs.readthedocs.io/en/latest/)for the Mailman’s Django based web frontend listening on http://172.19.199.3:8000/ . It will run 2 worker processes with 4 threads each. - Run a PostgreSQL server with a default database, username and password as mentioned in the
docker-compose.yaml. - Run mailman-core listening an LMTP server at http://172.19.199.2:8024/ for messages from MTA.
Before we can deploy the images, some common configuration should be set in docker-compose.yaml file.
Mailman-Core
These we need to change one variable:
HYPERKITTY_API_KEY: Hyperkitty’s API Key, should be set to the same value as set for the mailman-core.
The remaining three variables shall be keep default, if you are happy with PostgreSQL:
DATABASE_URL: URL of the database for the django to use. The standard docker-compose.yaml comes with it set to a postgres database, and to simplify we keep it default.DATABASE_TYPEandDATABASE_CLASS: The standard file ispostgres, and we also keep it default.
If you want to use a different DBMS, you need to change the three variables.
Mailman-web
These are the settings that you MUST change before deploying:
SERVE_FROM_DOMAIN: The domain name from which Django will be served. You should set it to the domain you are going to use,lists.example.comhere.HYPERKITTY_API_KEY: Hyperkitty’s API Key, should be set to the same value as set for the mailman-core.MAILMAN_ADMIN_USER: The username for the admin user to be created by default.MAILMAN_ADMIN_EMAIL: The email for the admin user to be created by default. Remember to use the verified email before.SECRET_KEY: Django’s secret key, mainly used for signing cookies and others.
Sample Docker Compose Configure
Please check this gist for a sample config. You had better not copy the config but edit it yourself.
Create Folders for Later Use
Sometimes we need to do some extra configuration directly with the Mailman application.
There are two configuration files on the host that interact directly with Mailman’s settings. These files exist on the host running the containers and are imported at runtime in the containers.
/opt/mailman/core/mailman-extra.cfg: This is the configuration for Mailman Core and anything that you add here will be added to Core’s configuration. You need to restart your mailman-core container for the changes in this file to take effect./opt/mailman/web/settings_local.py: This is the Django configuration that is imported by the existing configuration provided by the mailman-web container. To change or override any settings in Django, you need to edit this file.
To make it work, we need to create the folder:
1 | > sudo mkdir -p /opt/mailman/core |
MTA Configuration
Add the following settings to postfix’s main config /etc/postfix/main.cf :
1 | # Support the default VERP delimiter. |
Reload the Postfix by sudo postfix reload .
Then we need to configure Mailman to use Postfix. Add the following lines to /opt/mailman/core/mailman-extra.cfg:
1 | [mta] |
Finally, we need to set the default Email setting of mailman-web by creating a file named /opt/mailman/web/settings_local.py and fill:
1 | USE_SSL = False |
DEFAULT_FROM_EMAIL: This is the default address that used used as the FROM header in all the emails from your installation.SERVER_EMAIL: This is the address from which the errors emails will be sent to you.
Run the Docker Containers
OK. You are now ready to run the containers. Go into the docker-mailman folder and run:
1 | > docker-compose up -d |
Docker will download all necessary images and run a container for you. What you need to do is to wait.
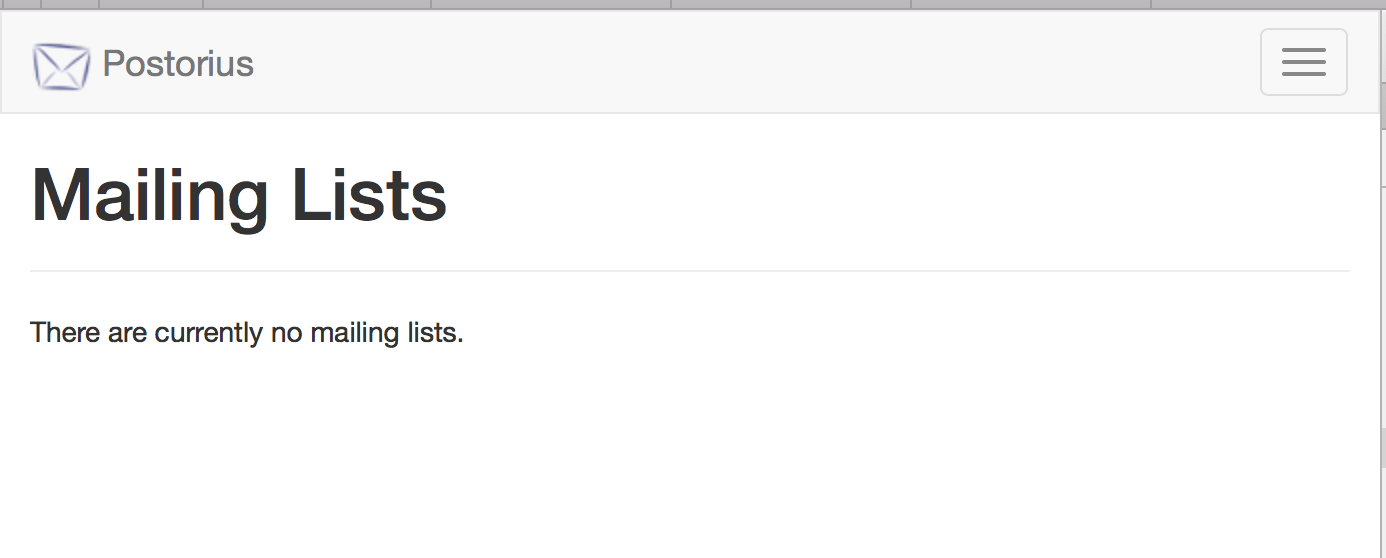
After the command runs, test if the service is running:
1 | > curl http://172.19.199.3:8000/postorius/lists/ |
If you see a bunch of HTML elements, you are done with containers.
Install Nginx & Configure it
It is advisable to run your Django (interfaced through WSGI server) through an actual web server in production for better performance. Here we use nginx, an HTTP and reverse proxy sever. It has been supporting many big sites such as Alibaba (which use a fork of nginx, called tengine).
Install nginx
One single command:
1 | > sudo yum install nginx-all-modules -y |
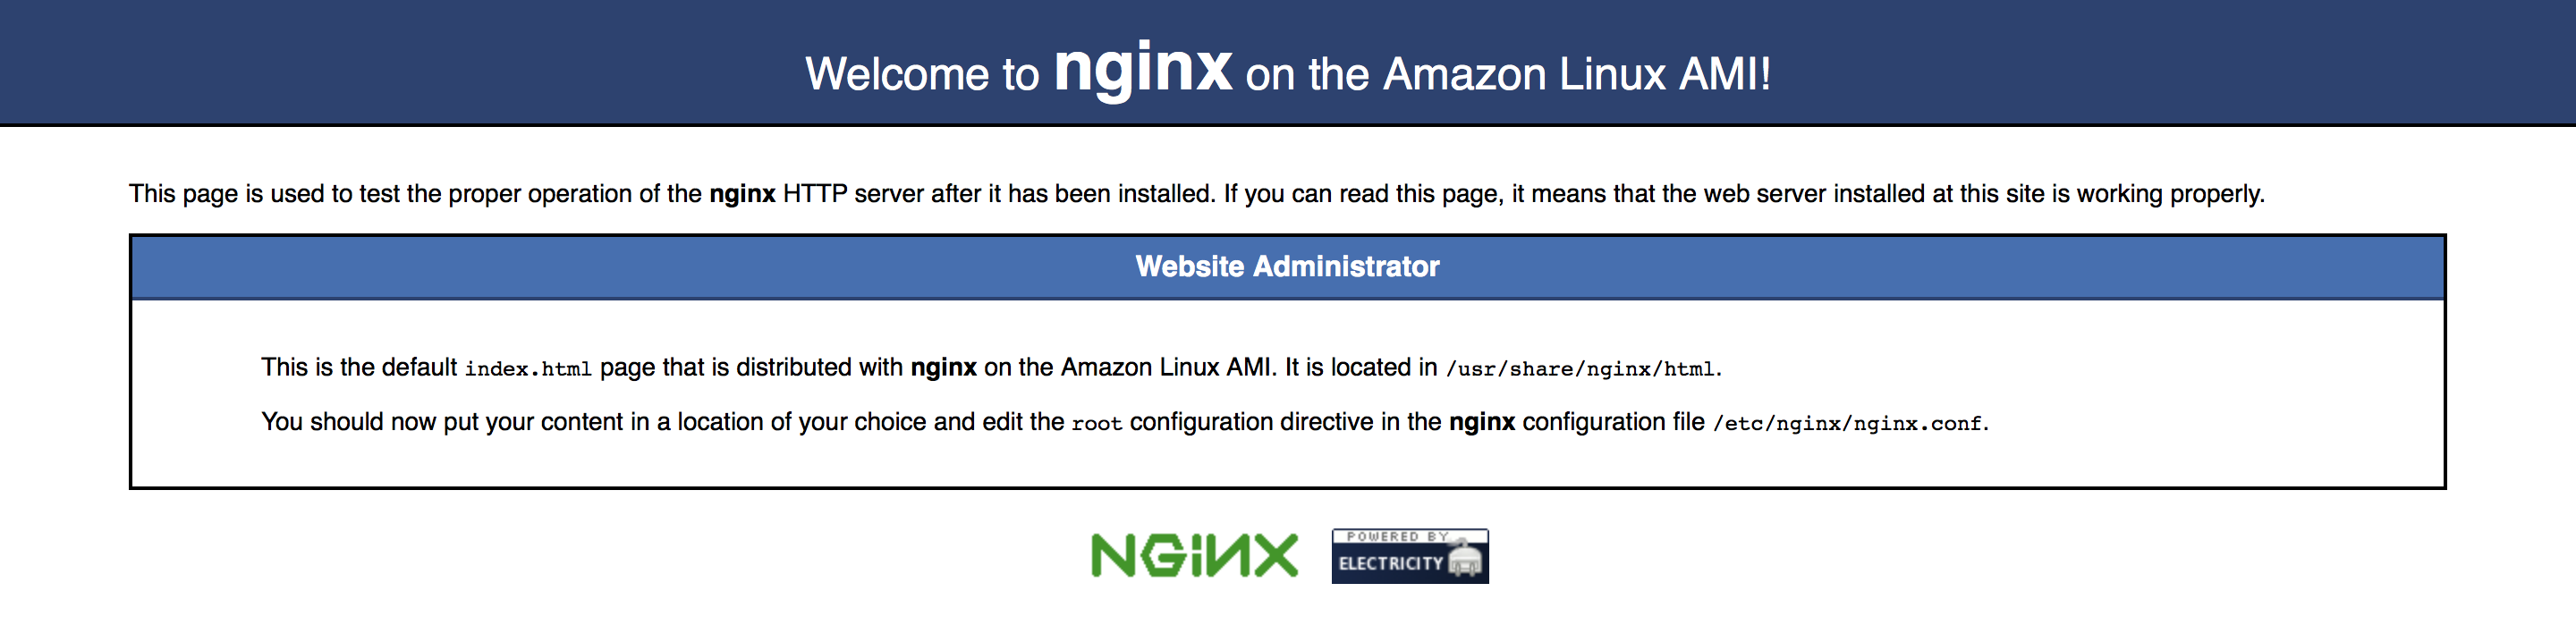
Then try to visit http://<your_domain>. you should see a Welcome to nginx on the Amazon Linux AMI! page.
Configure nginx
Create a new file in /etc/nginx/conf.d/ and name it with <your_domain>.conf .
1 | > sudo nano `/etc/nginx/conf.d/<your_domain>.conf` |
Fill in the following content:
1 | server { |
Then check if there is any error in config:
1 | > sudo nginx -t |
We can now restart the nginx process:
1 | > sudo service nginx restart |
Now you can test Mailman using http://<your_domain>.
Obtain Password for Default Admin Account
We have set the default admin username and email, but wait — where is the password? We need to obtain it by resetting password. Go to the mailman-web, click Sign In, click Forget Password and then enter the email address. You will receive an email with the resetting link. Follow the link to set the password.
You can now enjoy the Mailman 3.
Further Step on SSL
There are actually some further steps you can perform, for example, enable SSL. We won’t discuss it here, since you only need to do:
- Obtain a SSL cert (from letsencrypt maybe)
- Configure nginx to use the SSL
- Remove the
USE_SSL = Falseline in/opt/mailman/web/settings_local.py