|
|
|
- OS 5 Supported Models
- Dashboard Update Notification
- Manual Step #1 - Download OS 5 Firmware
- Manual Step #2 - Update to OS 5 Firmware
- Get iOS and Android Apps
- Web App Login
IMPORTANT:
My Cloud OS 5 cannot be downgraded to OS 3.
A volume must be created to do the firmware update.
Third-party apps are supported by the app vendor.
Apps in OS 3 (Backups, iTunes, DLNA, etc..) must be installed from the Apps tab in OS 5.
Need more help?
Answer ID 29498: Third-Party Apps Available for My Cloud OS 5Twonky DLNA Server v8.2.1 on My Cloud OS 5 does not have the Twonky Thumbnail Utility tool.
It cannot extract thumbnails from video content by default.
Need more help?
Answer ID 29845: Twonky Video Thumbnails Not Displayed on My Cloud OS 5
Dashboard Update Notification
- Login to the dashboard.
Need more help?
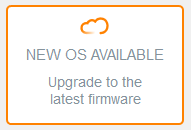
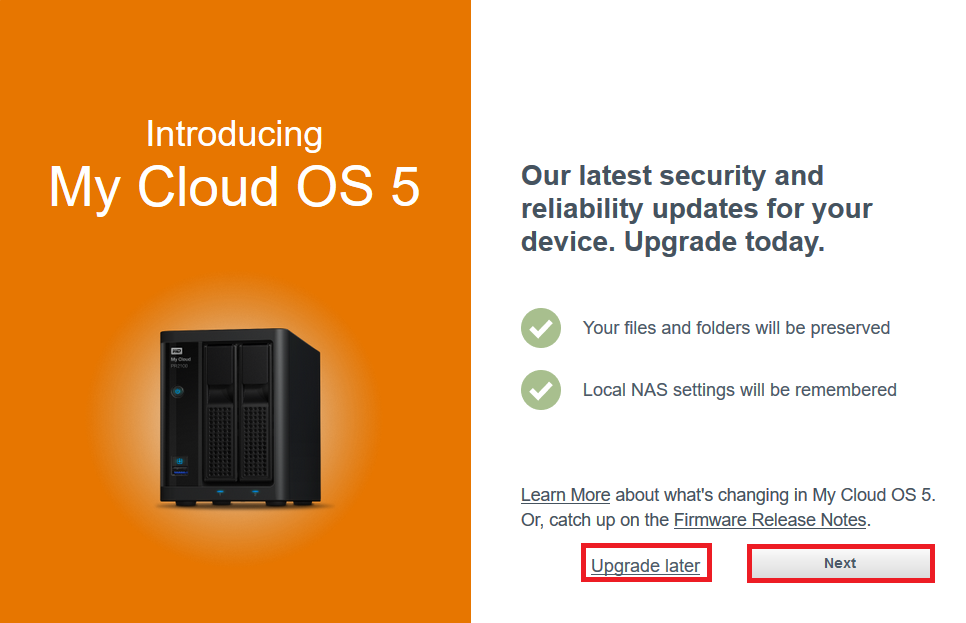
Answer ID 27432: How to Access the My Cloud OS 3 Dashboard - Click NEW OS 5 AVAILABLE.
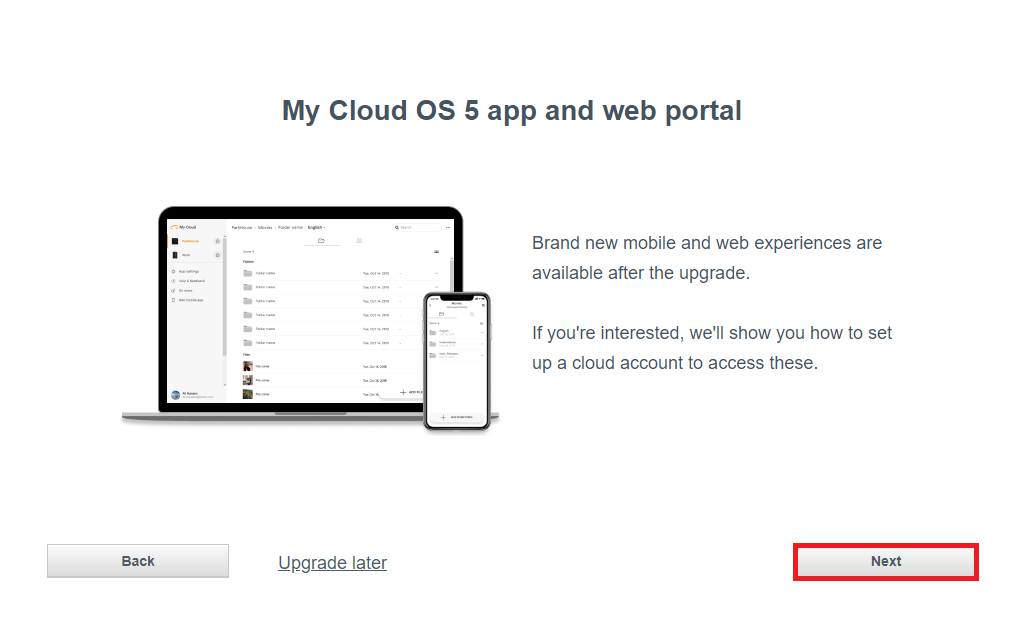
- Click Next.
Click Upgrade Later.
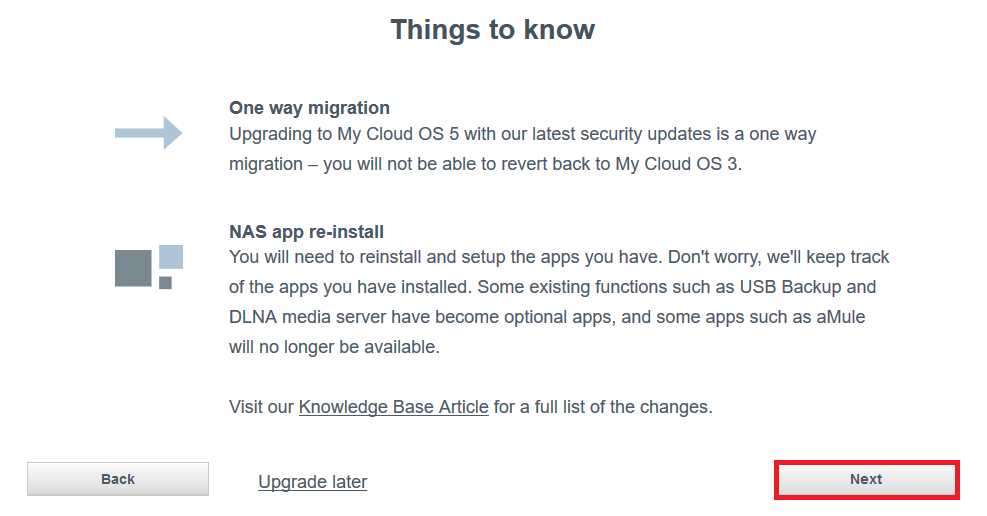
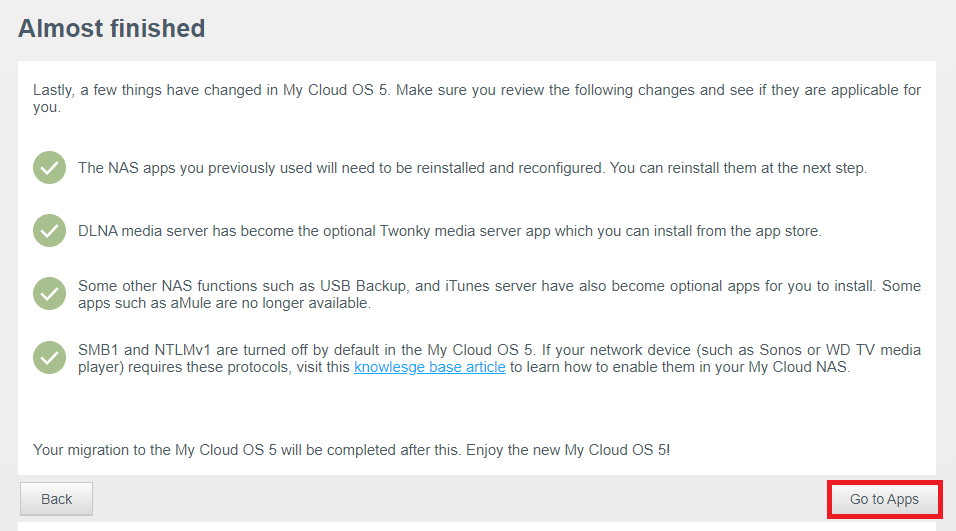
- Review Things to know.
- One way migration
Upgrading to My Cloud OS 5 is a one way migration.
There will be no option to revert back to OS 3. - NAS App Reinstall
You will need to reinstall the Apps you have
Click Next.
- One way migration
- Click Next.
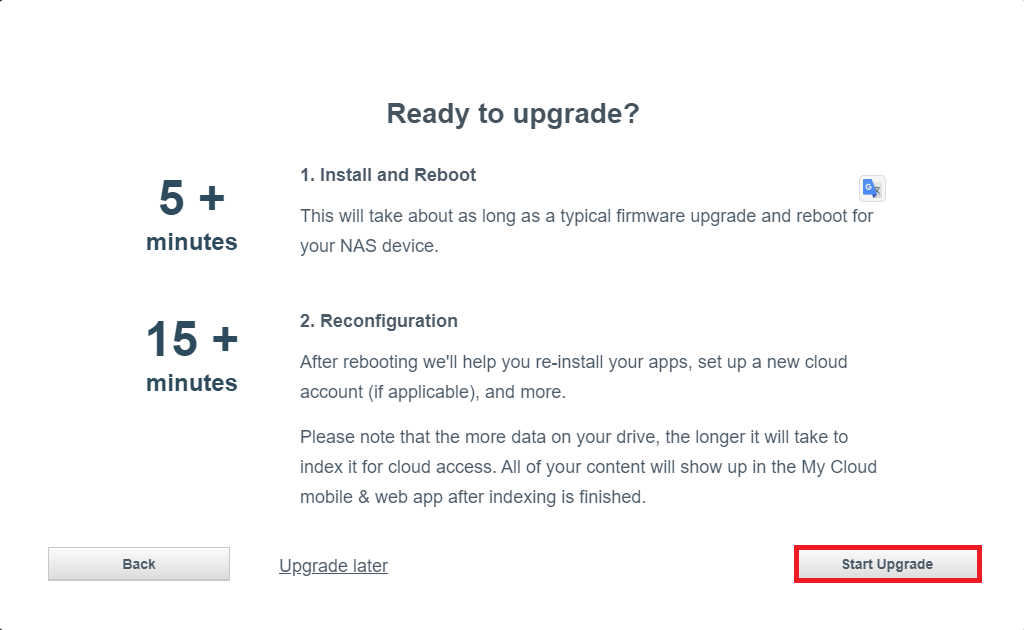
- Review Ready To Upgrade?
- Installation is 5 minutes.
- Reconfigure is 15 minutes.
Click Start Upgrade.
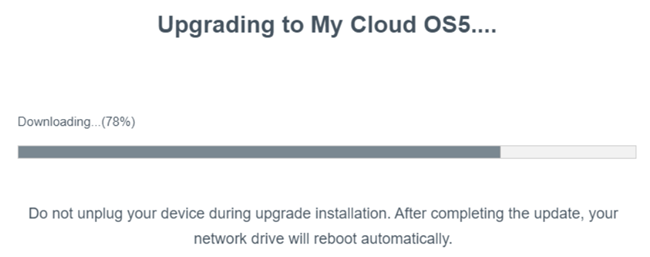
- Upgrading to OS 5...(Download)
IMPORTANT: Do not unplug the device during the upgrade process.
- Upgrading to OS 5...(Upgrade)
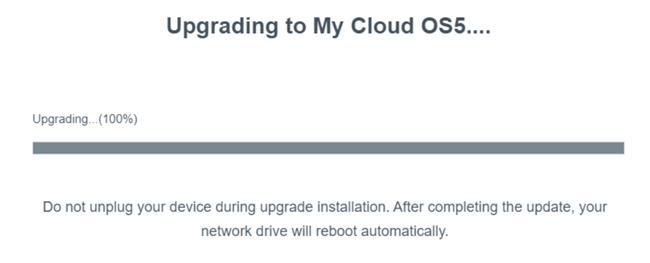
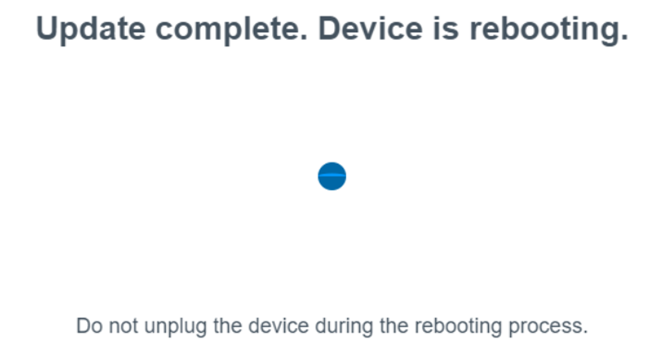
- Upgrade Complete.
It will reboot itself.
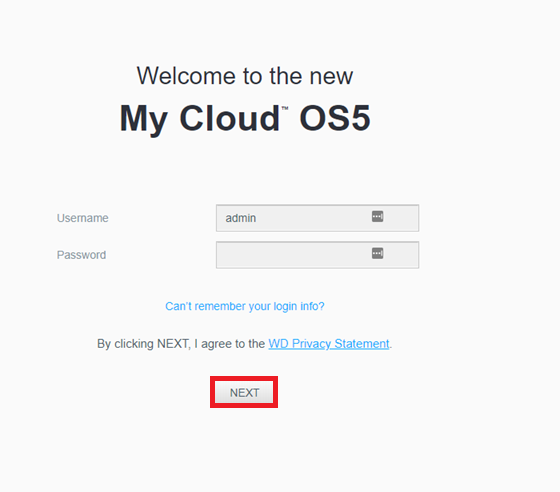
- Enter OS 3 Password.
Click Next.
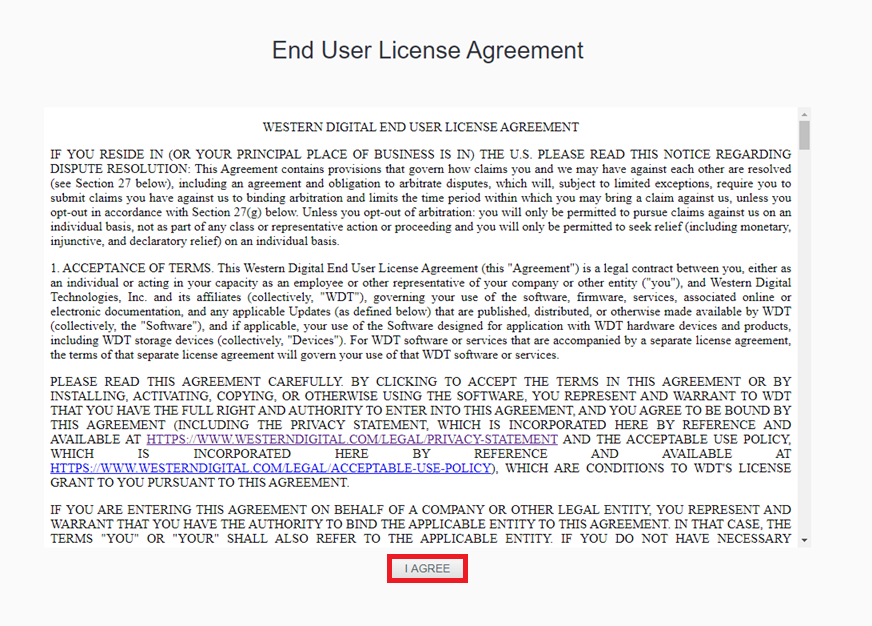
- Review the End User License Agreement.
Click I Agree.
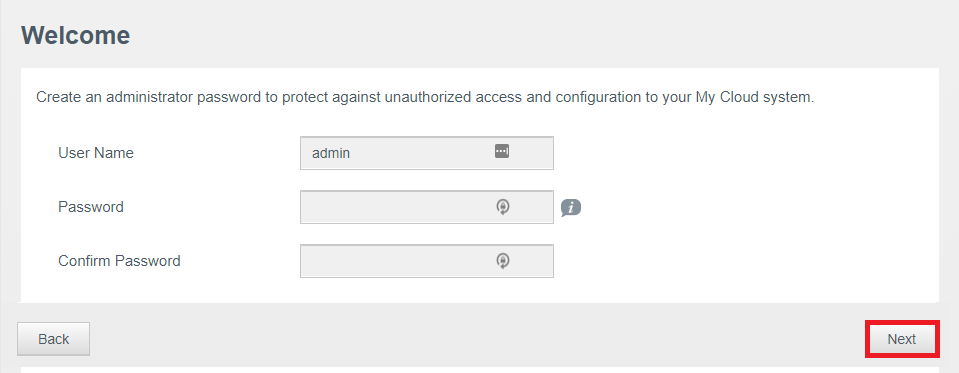
- Create a New Password.
Confirm Password.
Click Next.
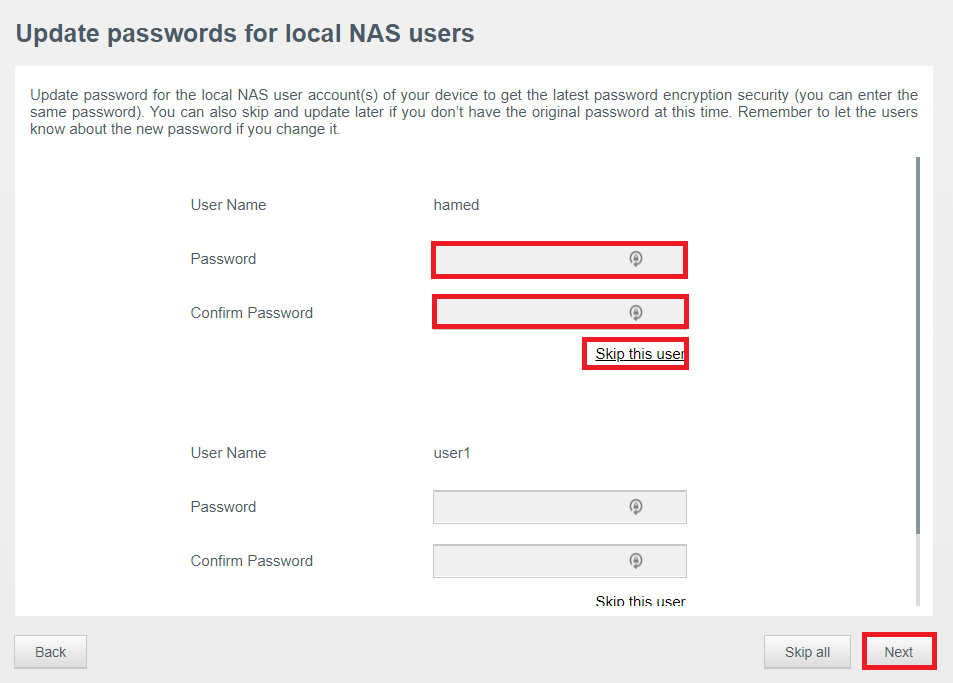
- Create a New Password.
Click Skip this user if the password should be set later.
Click Next.
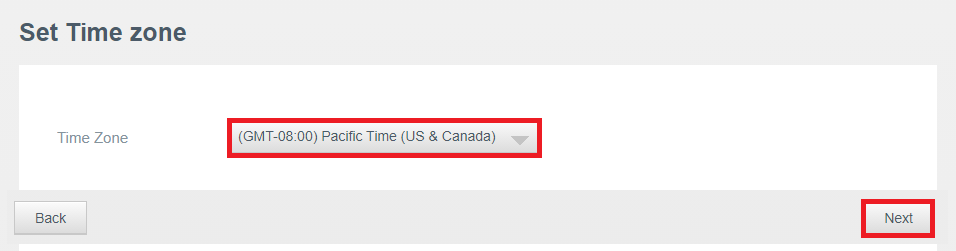
- Select a Time Zone.
Click Next.
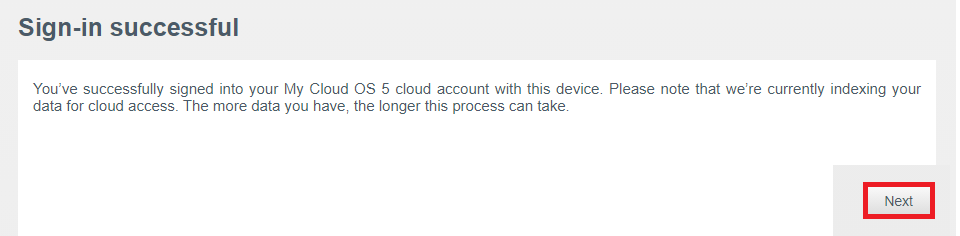
- Click Continue.
Click Skip Cloud Access if remote cloud access is not needed.
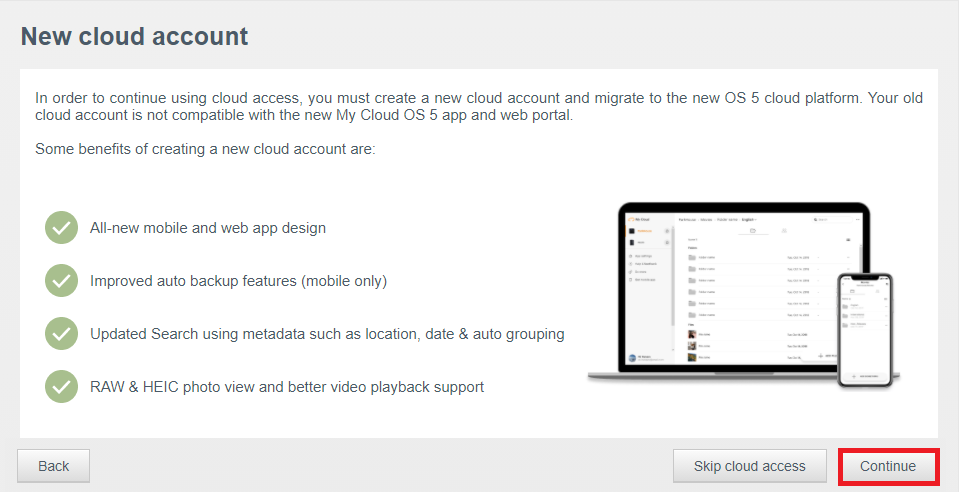
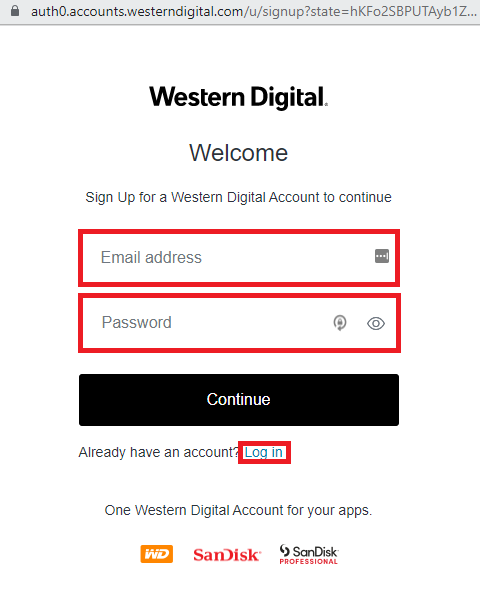
- Enter a new email address and password.
This will create a new Western Digital Cloud Account.
Click Login if an account is already created.
IMPORTANT:
Two-Factor Authentication (2FA) verification is required when a new device is setup for the first time or as needed.
Skip to Step 19 if not prompted for the (2FA) code. - Check the email account inbox for the Two-Factor Authentication (2FA) verification code from Western Digital.

The email will come from from noreply@accounts.westerndigital.com.
Check the Junk and Spam folder if the email is not in the inbox. - Copy the (2FA) code.
- Return to the Verify your Identity Local Network Access Dashboard page in the web browser.
- Enter the (2FA) code into the Enter the code box.
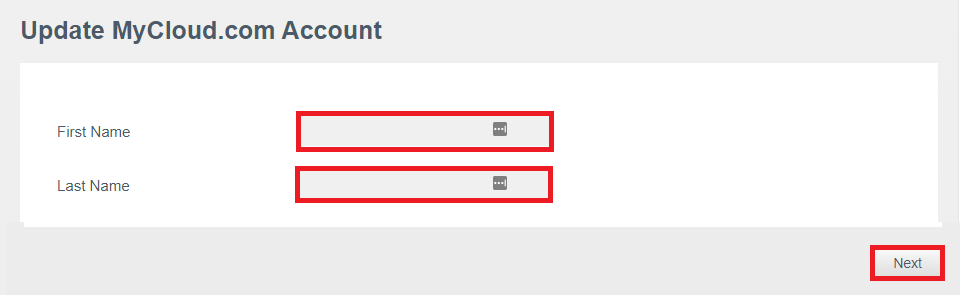
Click Continue. - Enter a First Name and Last Name for the new MyCloud.com.
Click Next.
- Select the share folder(s) to enable remote cloud access in the mobile and web app.
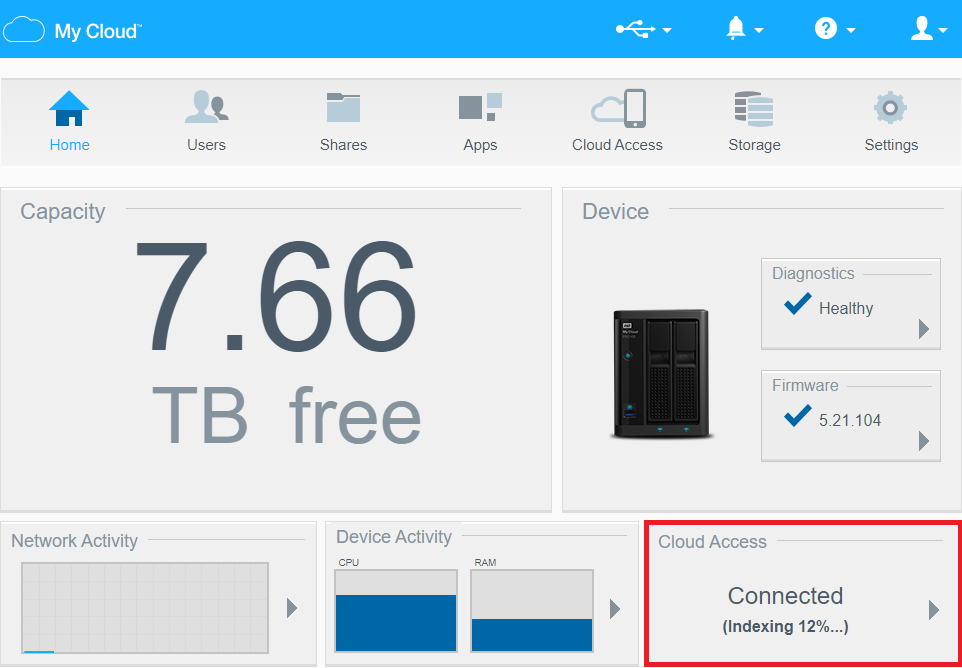
Indexing will start for the shares selected.
Need more help?
Answer ID 30021: My Cloud OS 5 Cloud Access Content Indexing FAQ
Click Next.

- Click Next.
- Click Yes to optimize video playback. (Recommended)
Click No to not optimize.
Need more help?
Answer ID 30042: Learn About My Cloud OS 5 Web and Mobile App Audio and Video PlaybackSupport
IMPORTANT: Optimizing Video Playback is only supported on My Cloud PR2100 and PR4100.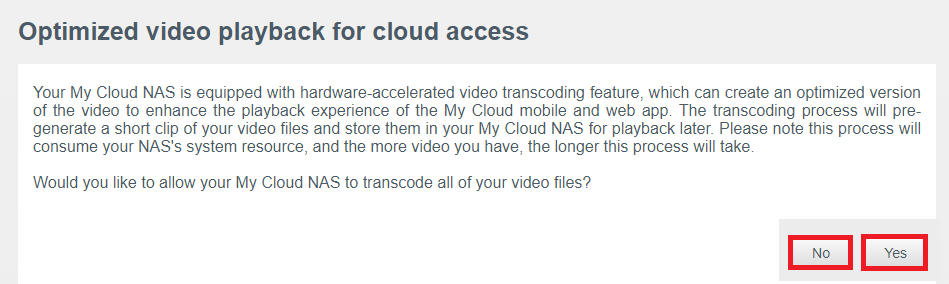
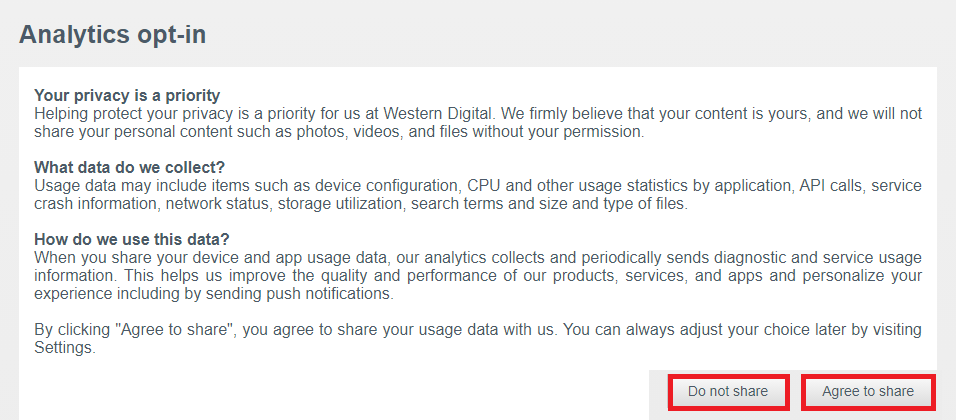
- Click Agree to share.
Click Do not share to not share analytics with WD.
- Click Go to Apps.
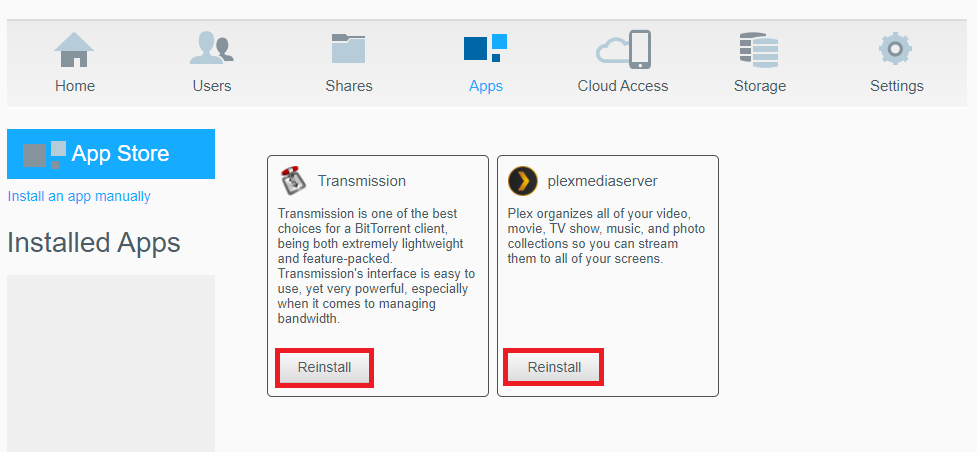
- Click Reinstall to install previous OS 3 apps.
IMPORTANT:Indexing will start when the Cloud Access is created for remote access using the web and mobile app.
Need more help?
- Answer ID:29836 My Cloud OS 5 Indexing in Progress Message
- Answer ID:29223 My Cloud OS 5 User Share Indexing
Next Steps and More Information
Add users and enable remote access.
Need more help?
Manual Step #1 - Download OS 5 Firmware
- Select one of the My Cloud Models that support OS 5 firmware.
- My Cloud
- My Cloud Mirror (Gen2)
- My Cloud EX2 Ultra
- My Cloud EX2100
- My Cloud EX4100
- My Cloud PR2100
- My Cloud PR4100
- My Cloud DL2100
- My Cloud DL4100
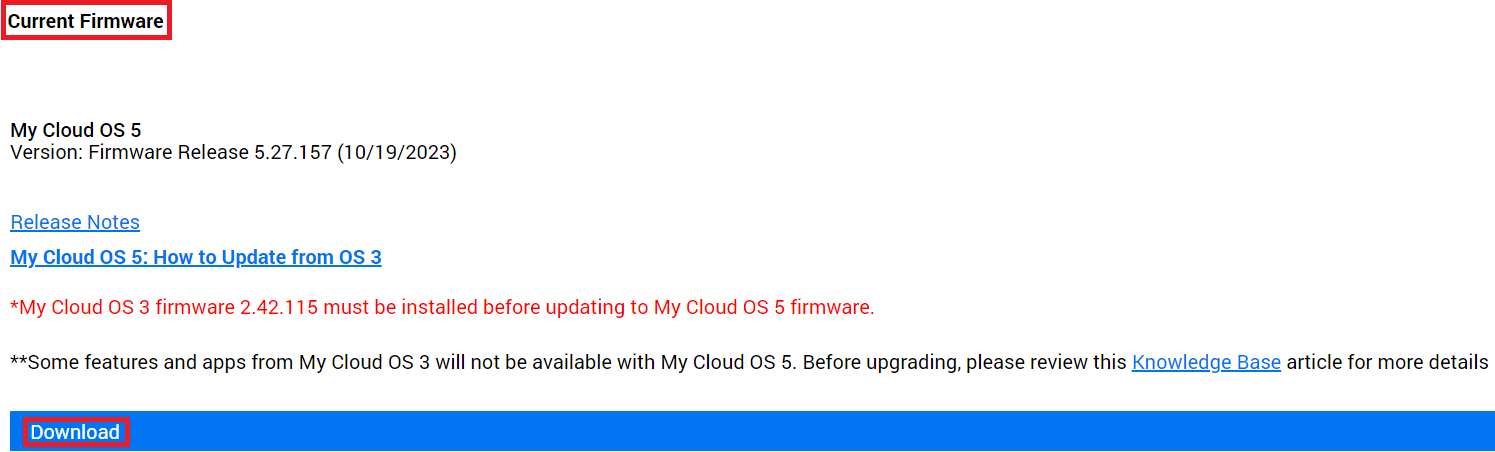
Scroll down.
Click Current Firmware.
Click DOWNLOAD to save the firmware.
- Go to the download location.
Verify the file name is correct for the My Cloud model.

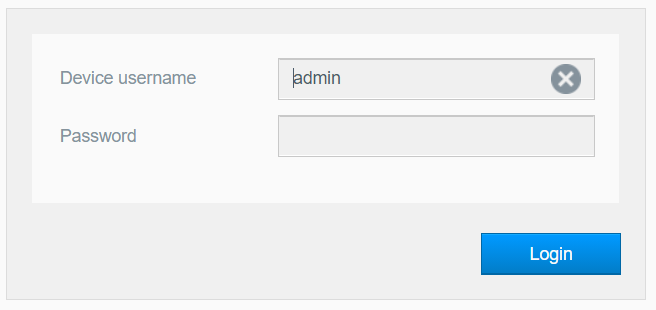
- Login to the dashboard.
Need more help?
Answer ID 27432: How to Access the My Cloud OS 3 Dashboard
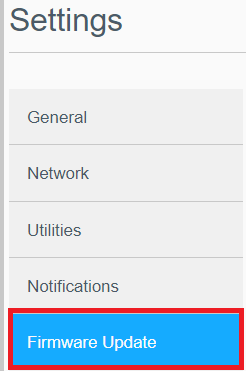
- Click Settings.

- Select Firmware Update.
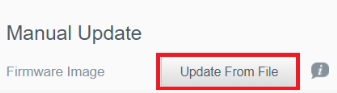
- Click Update From File.
- Go to the download location.
Click firmware image file.
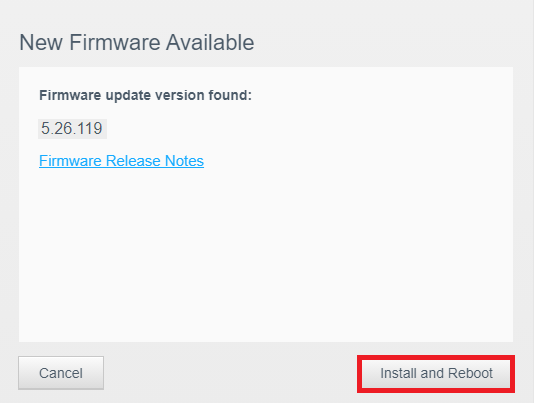
- Click Install and Reboot.
The firmware will download and update the My Cloud.
This may take several minutes.
 |
Critical: Do not unplug the My Cloud. |
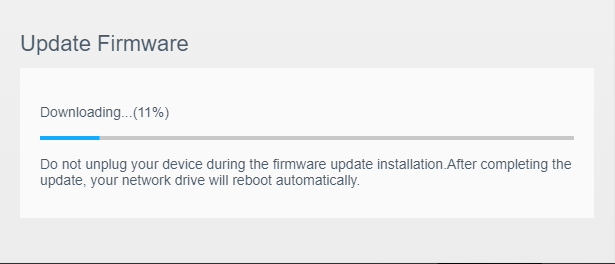
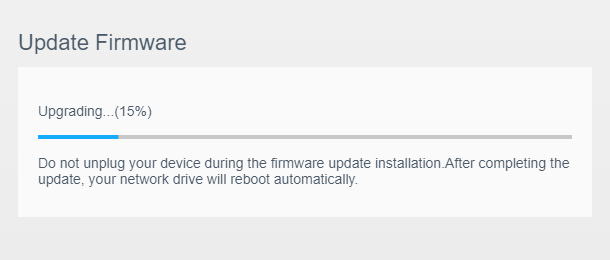
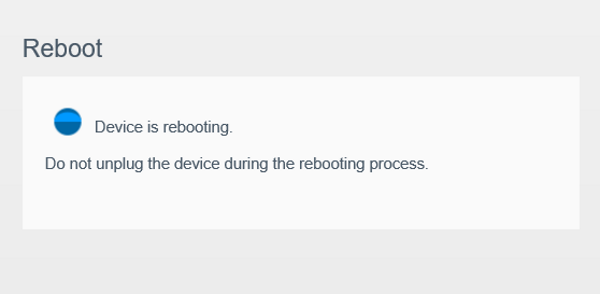
The My Cloud will reboot after the firmware update is complete.
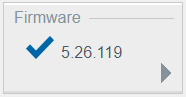
The firmware version will change after a reboot.
Manual Step #2 - Update to OS 5 Firmware
- The My Cloud must be on firmware 2.42.115 or higher before updating to OS 5.
- Download firmware 2.42.115 or higher from WD Support Website to Windows or macOS local drive.
- Login to the My Cloud dashboard as the "admin" user.
Need more help? Answer ID 27432: How to Access the My Cloud OS 3 Dashboard - Click Settings.
- Click Firmware.
- Click Manual Update from File.
- Locate the firmware file on the local drive.
- Select the firmware image file.
- Click Open.
- Click Install and Reboot
Wait for the update and reboot process to complete.
- Login to the dashboard as the "admin" user.
Need more help? Answer ID 27432: How to Access the My Cloud OS 3 Dashboard - Click NEW OS 5 AVAILABLE.
- Click Next.
Click Upgrade Later to cancel the upgrade.
- Review Things to know.
- One way migration
Upgrading to My Cloud OS 5 is a one way migration.
There will no option to revert back to OS 3. - NAS App Reinstall
You will need to reinstall the Apps you have
Click Next.
- One way migration
- Click Next.
- Review Ready To Upgrade?
- Installation is 5 minutes.
- Reconfigure is 15 minutes.
Click Start Upgrade.
- Upgrading to OS 5...(Download)
IMPORTANT: Do not unplug the device during the upgrade process.
- Upgrading to OS 5...(Upgrade)
- Upgrade Complete.
It will reboot itself.
- Enter OS 3 Password.
Click Next.
- Review the End User License Agreement.
Click I Agree.
- Create a New Password.
Confirm Password.
Click Next.
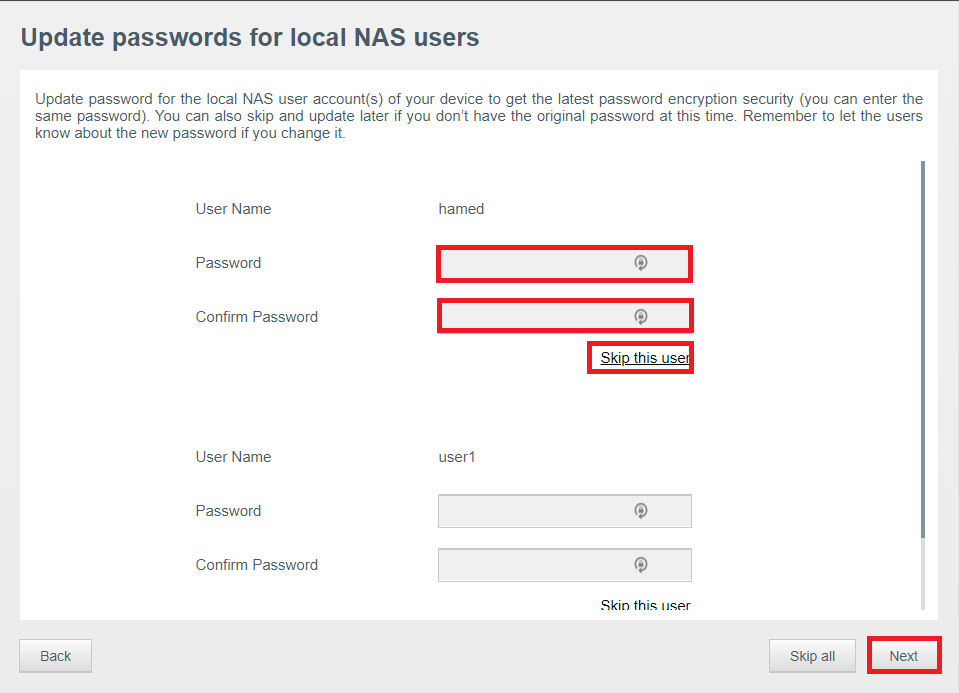
- Create a New Password.
Click Skip this user if the password should be set later.
Click Next.
- Select a Time Zone.
Click Next.
- Click Continue.
Click Skip Cloud Access if remote cloud access is not needed.
- Enter new email address and password.
This will create a new Western Digital Cloud Account.
Click Login if an account is already created.
IMPORTANT:
Two-Factor Authentication (2FA) verification is required when a new device is setup for the first time or as needed.
Skip to Step 19 if not prompted for the (2FA) code. - Check the email account inbox for the Two-Factor Authentication (2FA) verification code from Western Digital.
The email will come from from noreply@accounts.westerndigital.com.
Check the Junk and Spam folder if the email is not in the inbox. - Copy the (2FA) code.
- Return to the Verify your Identity Local Network Access Dashboard page in the web browser.
- Enter the (2FA) code into the Enter the code box.
Click Continue. - Enter a First Name and Last Name for the new MyCloud.com.
Click Next.
- Select the share folder(s) to enable remote cloud access in the mobile and web app.
Indexing will start for the shares selected.
Need more help?
Answer ID 30021: My Cloud OS 5 Cloud Access Content Indexing FAQ
Click Next.
- Click Next.
- Click Yes to optimize video playback. (Recommended)
Click No to not optimize.
Need more help?
Answer ID 30042: Learn About My Cloud OS 5 Web and Mobile App Audio and Video PlaybackSupport
IMPORTANT: Optimizing Video Playback is only supported on My Cloud PR2100 and PR4100. - Click Agree to share.
Click Do not share to not share analytics with WD.
- Click Go to Apps.
- Click Reinstall to install previous OS 3 apps.
IMPORTANT:Indexing will start when the Cloud Access is created for remote access using the web and mobile app.
Need more help?
- Answer ID:29836 My Cloud OS 5 Indexing in Progress Message
- Answer ID:29223 My Cloud OS 5 User Share Indexing
Next Steps and More Information
Add users and enable remote access.
Need more help?